Introduction
This tutorial will demonstrate how to make a simple direct drive solar chimes sculpture with a Voltaic mini solar panel. The solar chimes concept is based on an early solar power sound installation, from 1977, by the sound artist Joe Jones.
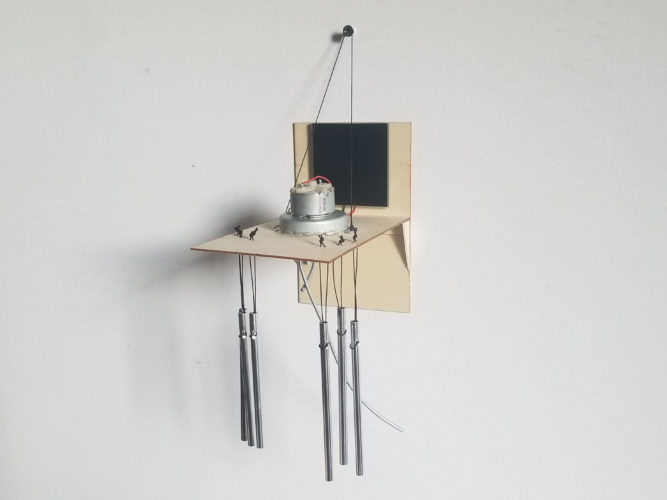
Solar chimes sculpture installed on wall.
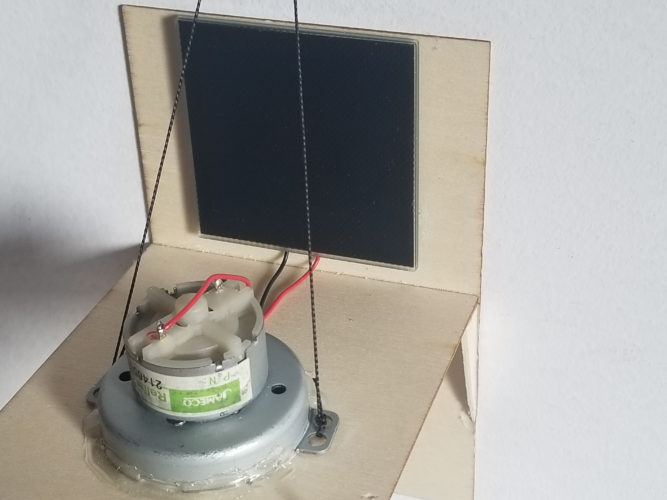
This circuit is about as simple of a solar circuit as possible. The PV cell is wired directly to the motor, without any additional components. The use of a geared motor allows us to avoid using more complex motor driver circuitry while still producing a nice slow movement.
The structure is made from two sheets of balsa wood that form a T turned 90 degrees. A couple additional small pieces are used as supports.
In this example, I’m using 5.9”x3.9”x0.08” sheets of balsa wood for the structure. Many other materials will work just as well, from upcycled cardboard to higher quality materials. Similarly, you don’t necessarily need actual chimes like I’m using here. Experiment with different materials to get different types of sounds from your sculpture.
This project is intended to be mounted on an indoor wall. Mount the sculpture in a location that gets hit with sunlight in the afternoon and it will be a good reminder to get off the computer and go for a walk.
Parts List for Solar Chimes
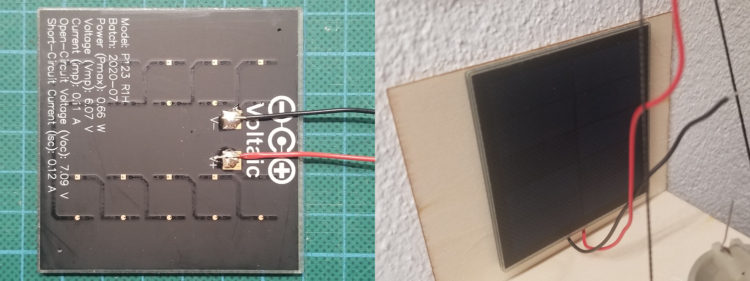
- 0.6 Watt 6 Volt Mini Solar Panel (P123)
- Balsa wood
- String
- 12 gauge steel wire (You can substitute wire from a metal coat hanger or any other type of sturdy wire that can be bent as needed)
- Chimes
- Geared 6V DC Motor
- Screw or hook
- 22 gauge electrical wire
Recommended Tools:
- Soldering iron and solder
- Hot glue gun and hot glue
- Drill
- 1/2” Drill bit
- 1/16” – 3/32” Drill bit (size depends on the string thickness)
- Pliers
- Scissors
- Pencil
- Wire strippers
- Wire cutter
- Exacto knife
- Ruler
Build Instructions
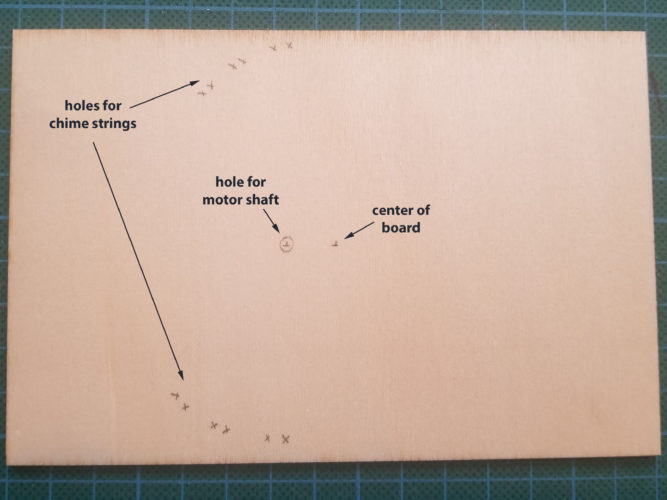
- Prepare the horizontal piece that the motor will be attached to.
- Mark the motor shaft hole. The hole should be located at least ¼” off center on the long edge. By offsetting the motor, it is easier to keep the motor arm from hitting the wall when it is installed.
- Mark pairs of holes in a semi circle around the motor to hang the chimes from.
Step 1
- Drill the hole for the motor shaft with a ½” drill bit. Use a small drill bit for the chime strings. The exact size of these holes may depend on the thickness of string you are using. (I used a 1/16” bit.)
- Lightly sand the holes. (optional)
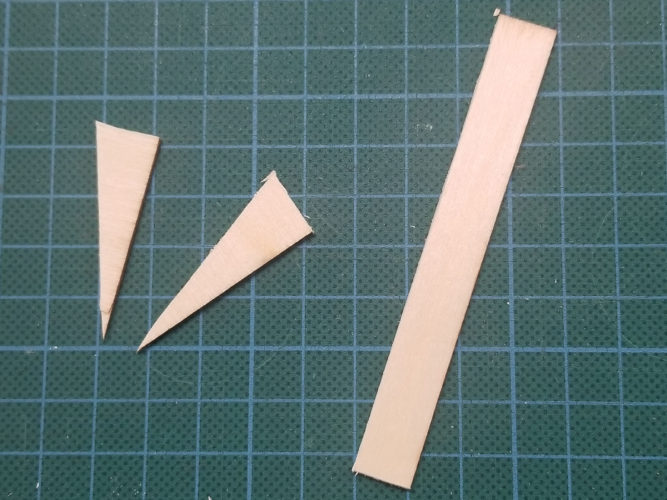
- Cut the support pieces
- Cut a thin strip of wood about 3.7”x1/4”.
- Cut 2 small 90 degree triangles (roughly ¼” and 1” sides)
Step 2
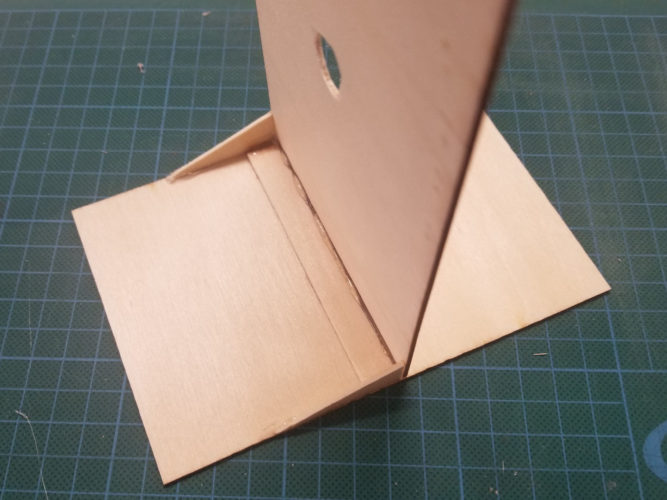
- Assemble wooden structure
- Draw a line across the center of the board
- Glue the thin strip of wood from step 2A centered underneath the line
- Glue the long edge of the triangular pieces to the edges of the board
- Glue the horizontal piece that the motor will be mounted on to the support pieces.
Step 3
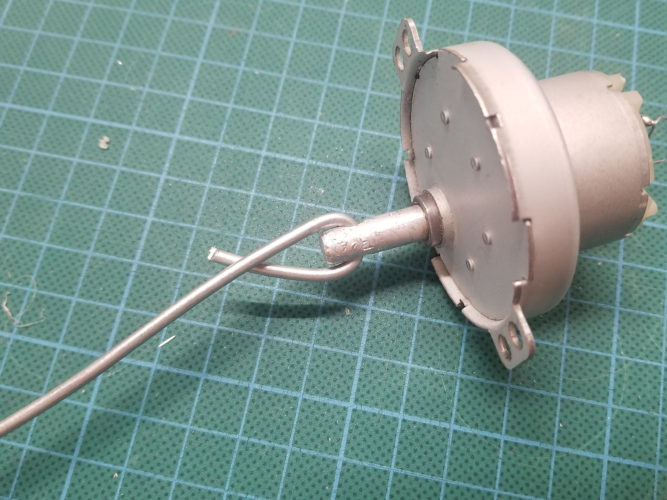
- Attach the arm to the motor shaft
- Cut an 8″ to 12” piece of 12 gauge wire.
- Stick the wire through the hole on the motor shaft so that roughly 3/4” is sticking out.
- Using a pair of pliers, crimp the wire to the shaft so that it cannot move.
Step 4
- Cut a piece of string roughly 16” long and tie each end to the flanges on either side of the motor (note that the length of the string will need to change if the back of your structure is larger than this example).
- Stick the arm and motor shaft through the hold on the horizontal board. Glue the edges of the motor into place. Avoid gluing the flanges where the string is tied in case you need to adjust the length of the string.

Step 6 (Left: top view, Right: bottom view)
- Prepare the solar panel
- Hold the solar panel in place and measure out the length of your wires. (You may want to leave them a little long and cut them down as needed, because it will be difficult to attach new wires to the panel once it is glued in place.)
- Solder one wire to the positive terminal of the panel and the other wire to the negative terminal of the panel.
- Glue the panel to the top of the backboard with the wires sticking out the bottom.
Step 7
- Connect the positive wire from the solar panel to the positive (red) terminal on the motor. Connect the negative wire from the solar panel to the other terminal on the motor.
Step 8
- Attach chimes with length of string about 8″ – 10” long.
- Bend the 12 gauge wire slightly so that it catches the chimes as it turns. Shorten the chime strings and 12 gauge wire as needed.
- Hang the sculpture on a screw or hook on a wall that gets sun at some point during the day.
Solar chimes sculpture installed on wall.