The Digi IX30 cellular router is used in a broad range of industrial applications including private LTE networks. In cases where power is difficult to access, our CORE Solar Systems can run the router and any accompanying sensors.
There are two ways to monitor the performance of the solar panel and battery in this situation. You can use the Voltaic battery health monitor or send the data from our battery directly to the router and the Digi Remote Manager® dashboard. This eliminates having two cellular connections.
In this post we show how to:
- physically connect the RS485 output of the Voltaic battery to the router
- program the Digi IX30 using Python to receive data from the battery
- present the data on the Digi dashboard
Hardware Requirements
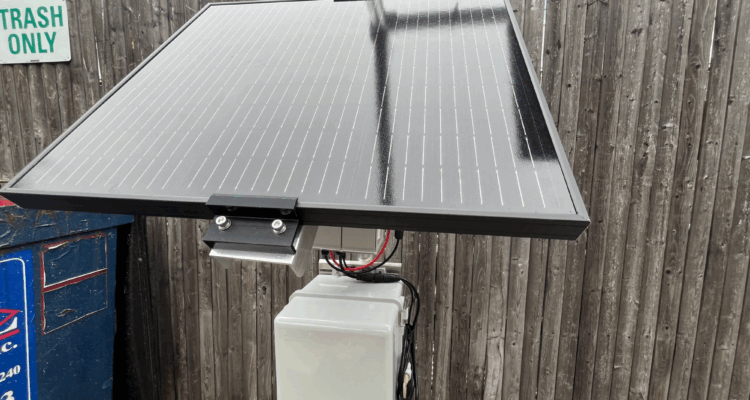
- Voltaic CORE Solar System and a waterproof enclosure, preferably with DIN Rail
- Digi IX30
- M8 RS485 cable
- RS485 to USB adapter
- Female to male USB extension cable
- For configuration only: ethernet cable, computer with ethernet port or ethernet to USB adapter
Hardware Setup
Ensure your router has an activated SIM card installed. Connect the power terminals of the Digi IX30 to the output of the Voltaic battery. The router should automatically power on and begin looking for a cellular connection. Once it has found a connection, the lights will be a steady blue color.
Note that we could swap the default antennas for smaller version to allow for a smaller enclosure.

Connect the M8 cable from the RS485 port on your battery and the other end of the cable to your enclosure. Then connect the GND, A+, and B- wires to the corresponding terminals of your RS485 to USB adapter.
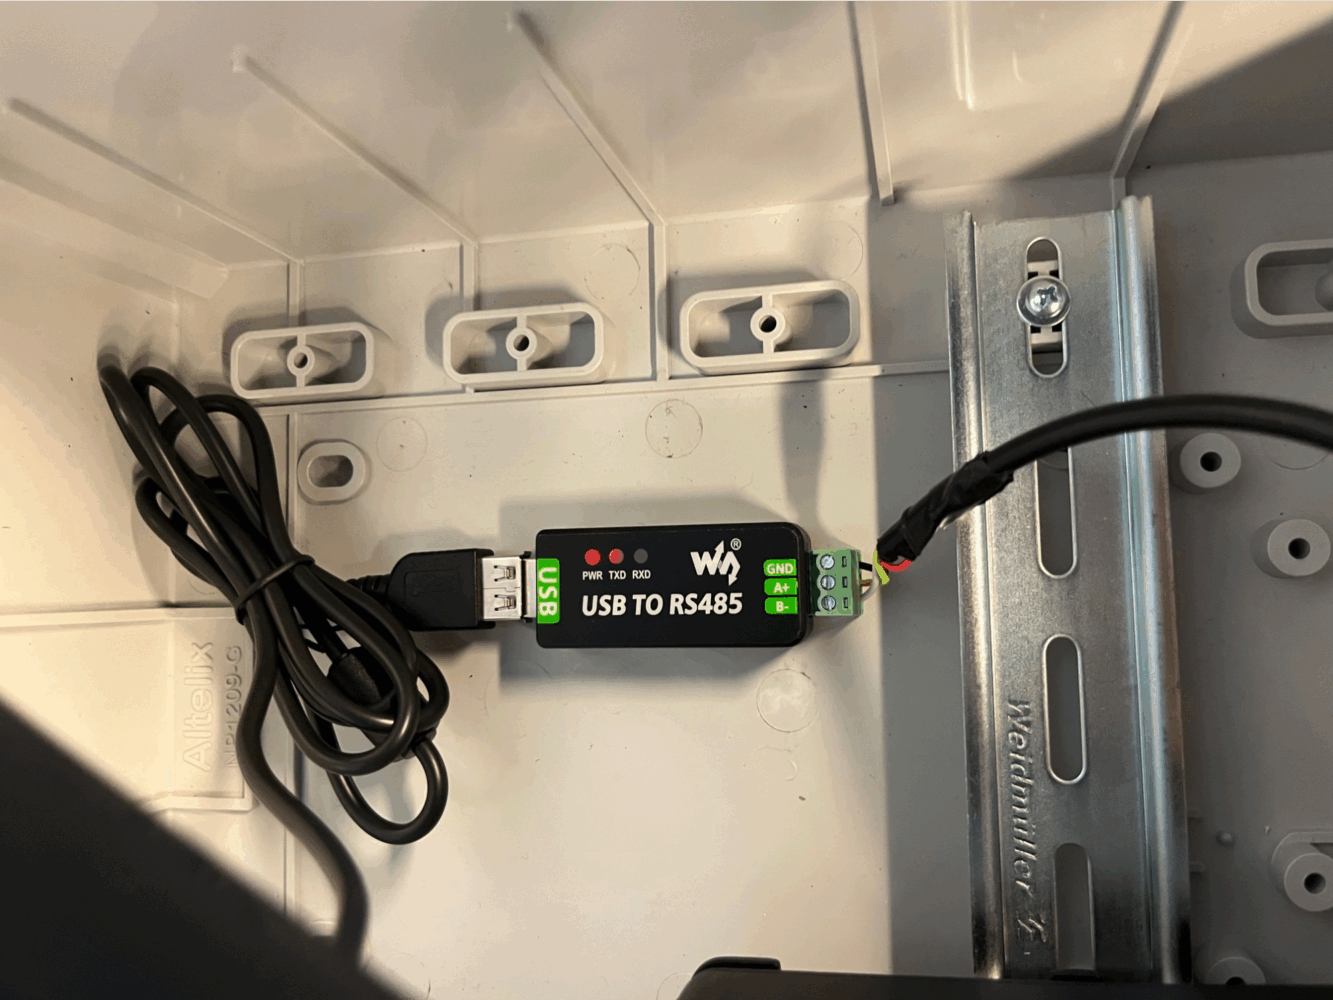
Connect the USB adapter to the USB port on your router directly or with a female-to-male USB extension cable.
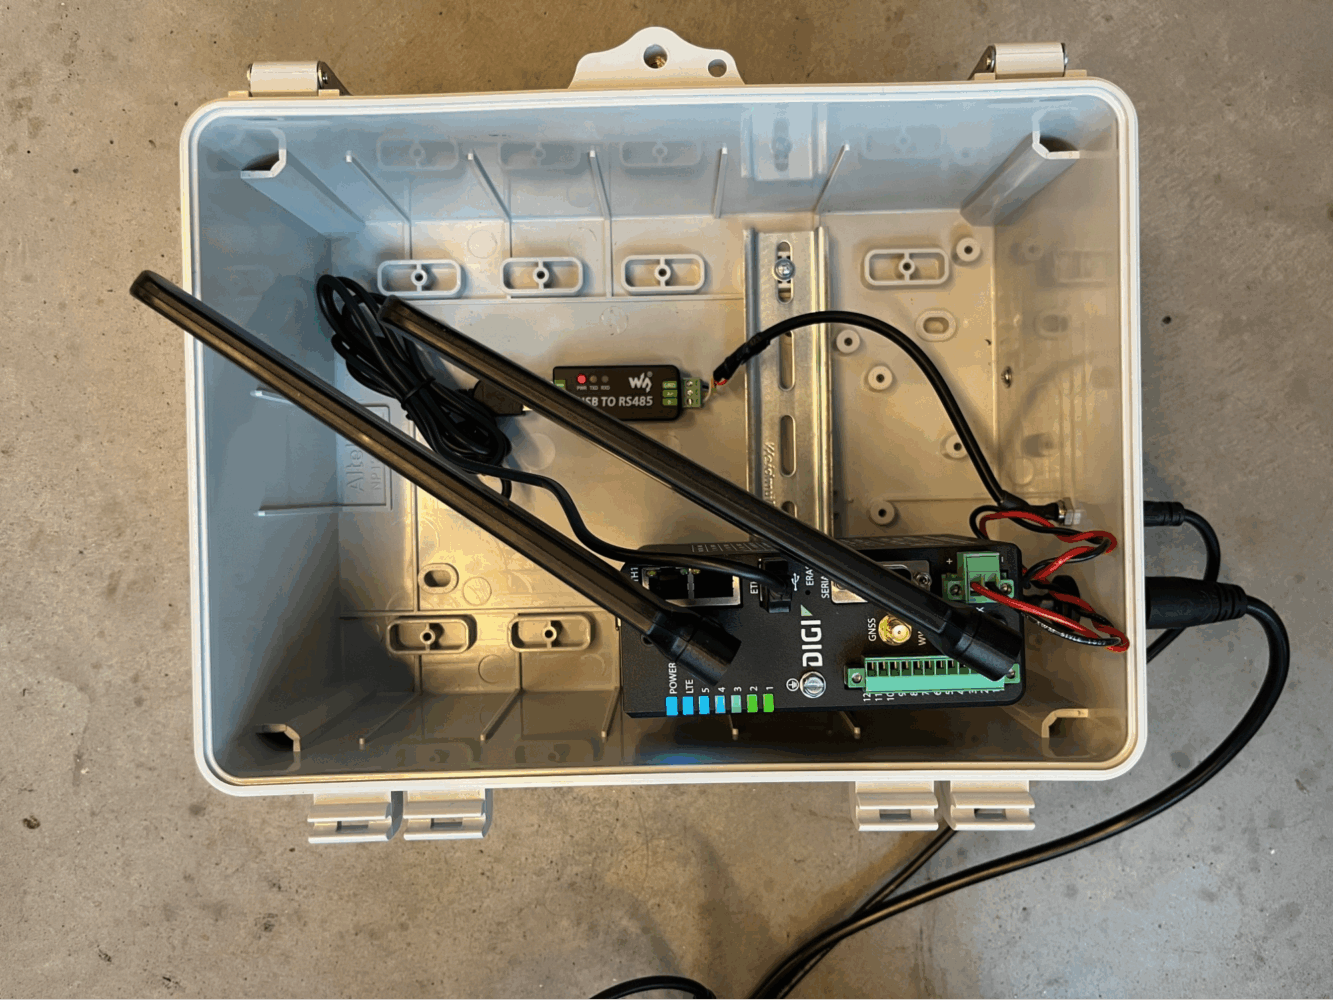
Now the Digi IX30 is ready to be programmed to read data from your charge controller and transmit the data via cellular connection to Digi Remote Manager.
Digi IX30 Configuration
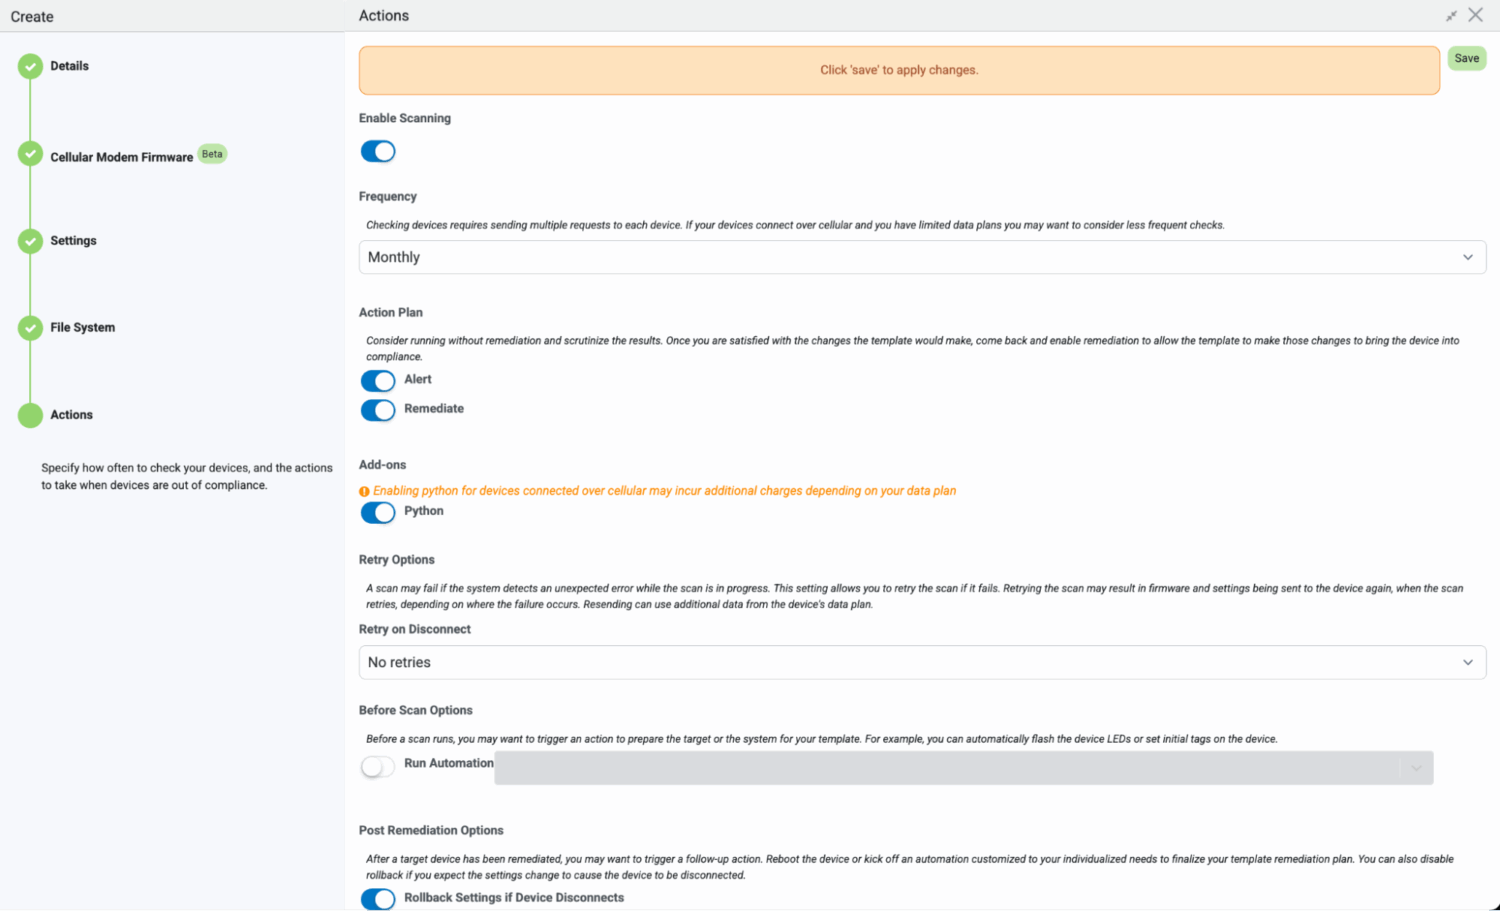
First, add your Digi IX30 to Digi Remote Manager. You will need to connect your router to a computer using an ethernet cable to do this. In Digi Remote Manager, create a new Template. Select your Digi IX30 as the model device. Leave other settings as default until you get to the “Actions” screen. Here, check “Enable scanning” and “Remediate” under “Action Plan.” Under Add-ons, check “Python.”
Save your template, then click into it to further edit its settings. Note that you can also make these setting changes through the Web UI if your router is connected to your laptop via ethernet
— follow Digi’s instructions here.
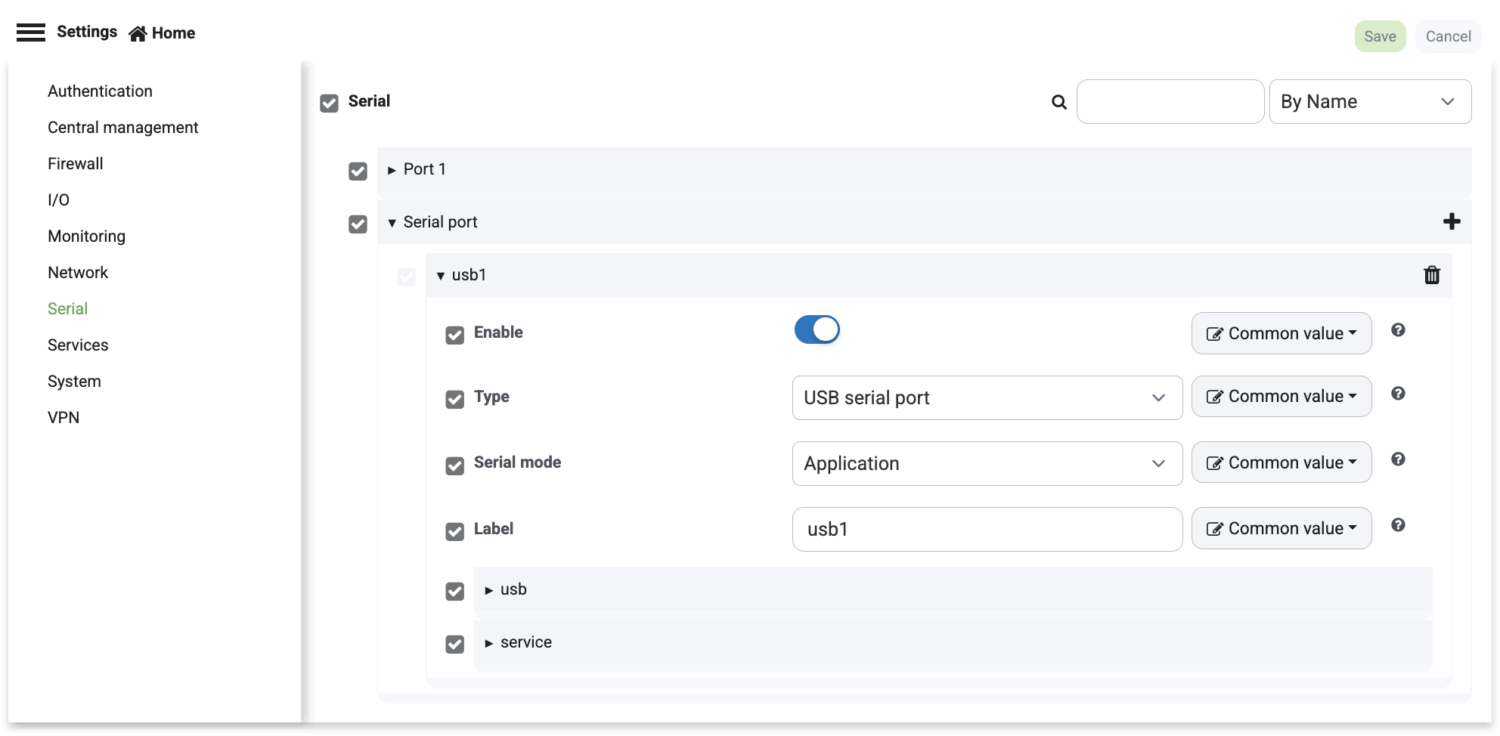
On the “Serial” tab, press the “+” button to add a serial port. Name it “usb1,” select “USB Serial Port” for type, and set the Serial Mode to “Application.” This will allow your Python script to use the USB port to read data from the Voltaic CORE Solar System.
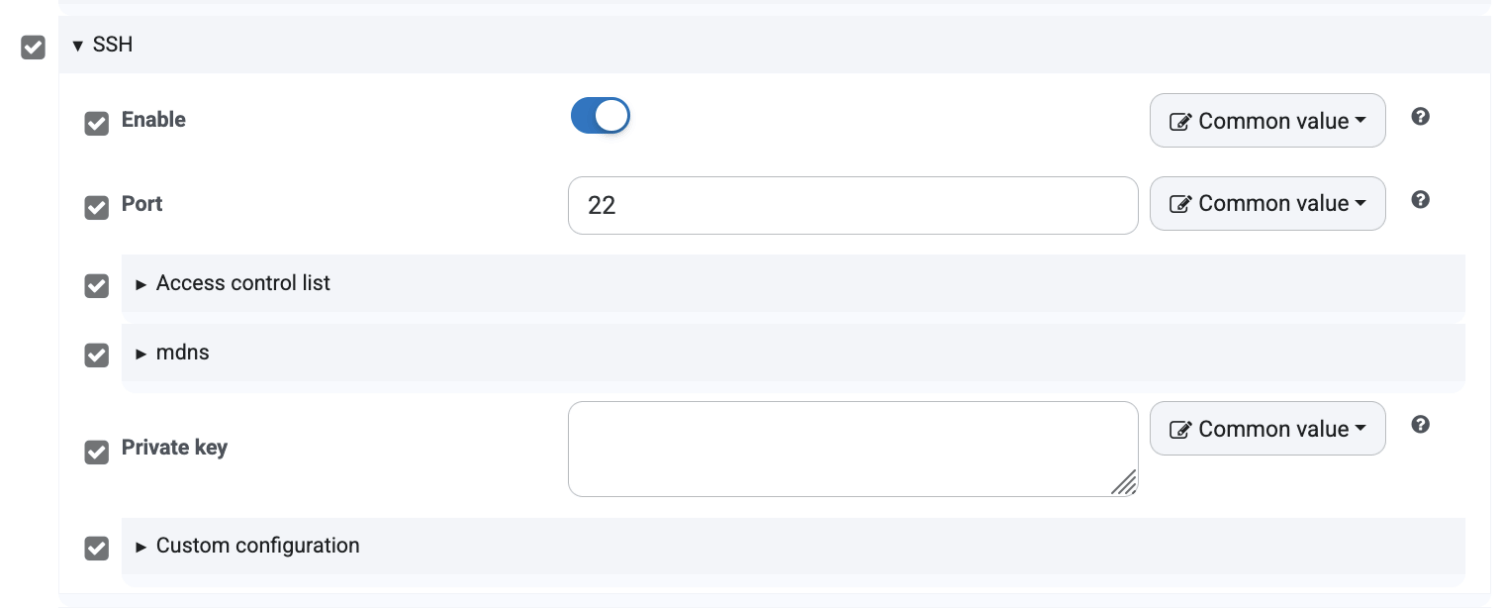
On the “Services” tab, enable SSH and Service Discovery (mDNS). This will enable SSH access from Digi Remote Manager, which we will use to install Python packages and test our script.

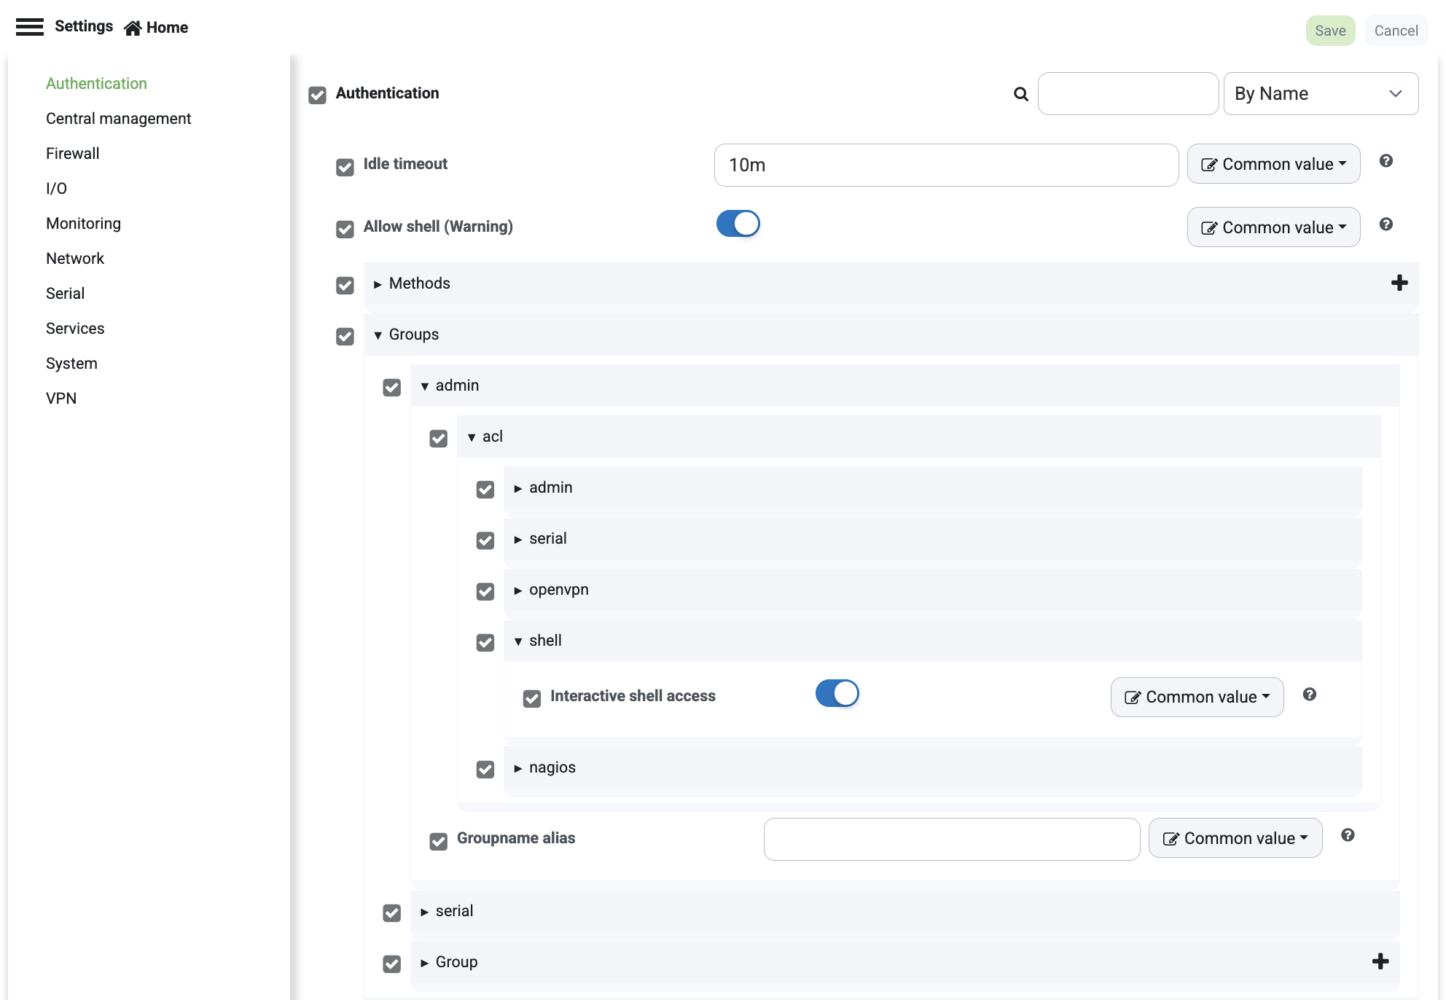
On the “Authentication” tab, expand Groups > admin > acl > shell and enable “Interactive shell access.”
Now save your template and press “Scan now” in the sidebar. After a few minutes, the template will be installed on your Digi IX30.
Python setup
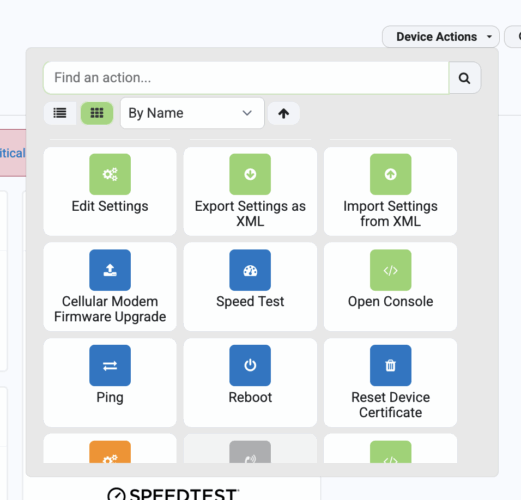
In Digi Remote Manager, go to your device page, then select “Open console” under “Device actions.”
Once the console loads, press “S” and hit enter to enable the shell. Run “python —version” to verify that Python is installed, and then run “pip install pymodbus==3.8.6” to install the Python package we will use to communicate with the Voltaic CORE Solar System.

On your computer, create a file called main.py with the following code:
from pymodbus.client import ModbusSerialClient
import datetime
from digidevice import datapoint
from digidevice.datapoint import DataPoint
from digidevice.datapoint import DataType
import traceback
# modbus parameters
PORT = "/dev/serial/usb1"
BAUDRATE = 9600
# list of tuples (name, register, is_signed, unit) for charge controller data
# from Voltaic Systems documentation https://voltaicsystems.com/rs-485-guide/
REGISTERS = [
("battery_voltage", 0x30A0, False, "V"),
("battery_current", 0x3047, True, "A"),
("system_voltage", 0x304E, False, "V"),
("system_current", 0x304F, False, "A"),
("load_voltage", 0x304A, False, "V"),
("load_current", 0x304B, False, "A"),
("environmental_temp", 0x30A2, False, "C"),
("controller_temp", 0x3037, False, "C"),
]
global client
# helper function to convert twos complement to int
def twos_complement_16bit_to_int(val):
if (val & (1 << (16 - 1))) != 0:
val = val - (1 << 16)
return val
# main loop
def main_loop():
global client
print(f'{datetime.datetime.now()}: Running main loop')
data_points = []
try:
# run in loop
for name, register, is_signed, unit in REGISTERS:
print(f'{datetime.datetime.now()}: Reading {name}...')
# separate try catch for each iteration of for loop, so other registers are still attempted
try:
# read register using modbus
response = client.read_input_registers(register)
register_value = response.registers[0]
# if signed, convert from twos complement to int
if is_signed:
register_value = twos_complement_16bit_to_int(register_value)
# divide 16 bit int by 100 to get float value
value = register_value / 100.
# create Digi data point and append to array
data_point = DataPoint(name, value, units=unit, data_type=DataType.FLOAT)
data_points.append(data_point)
print(f'{datetime.datetime.now()}: Successfully read {name}')
except Exception:
traceback.print_exc()
# upload all data points to Digi Remote Manager
print(f'{datetime.datetime.now()}: Uploading data points to DRM...')
datapoint.upload_multiple(data_points)
print(f'{datetime.datetime.now()}: Successfully uploaded data points to DRM')
except Exception:
traceback.print_exc()
if __name__ == '__main__':
client = ModbusSerialClient(PORT, baudrate=BAUDRATE)
client.connect()
main_loop()
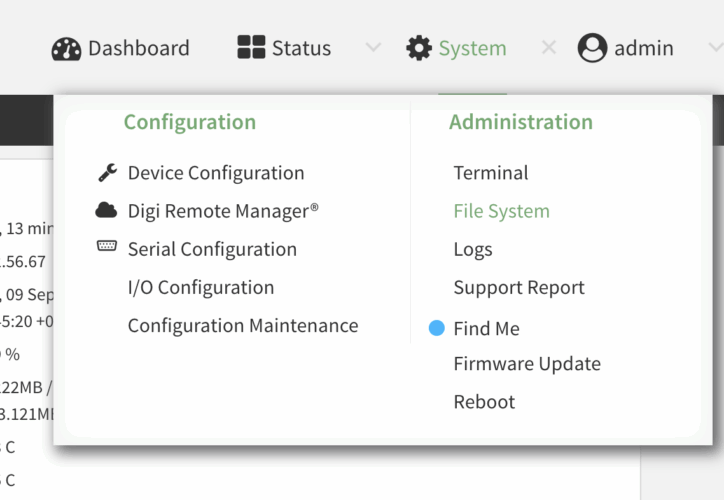
Connect to your Digi IX30 via ethernet (ETH2 port) and access the Web UI by going to in a browser, then logging in with the username “admin” and the password provided with your router. In the web UI, go to System > File System. Navigate to and upload your Python script.
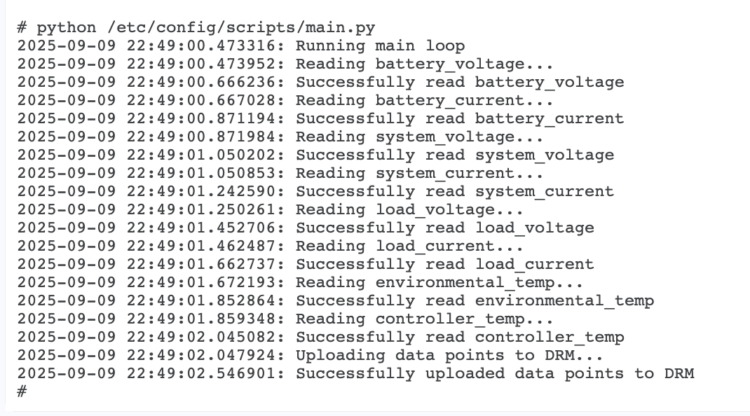
You can test this script by re-opening the console through Digi Remote Manager, entering the
shell by pressing “S” and Enter, and running “python etc/config/scripts/main.py”. You should see
the following logs:
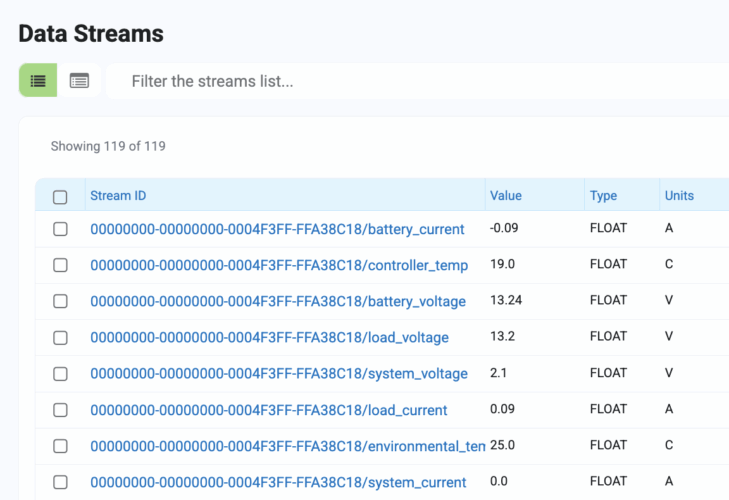
In Digi Remote Manager, navigate to the “Data Streams” tab. You should see battery-related data appear on the dashboard.
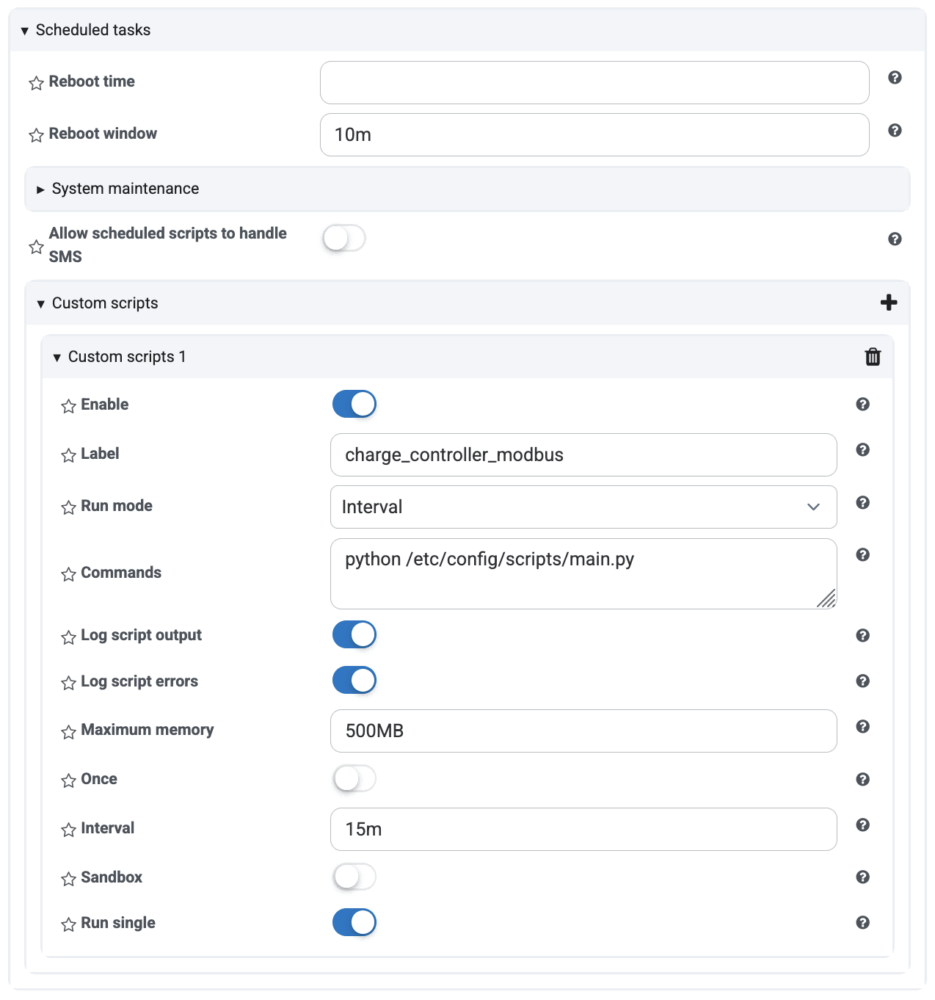
Lastly, we will configure the script to run automatically on an interval. Re-open the settings page of the template you created and go to the System tab. Expand the “Scheduled tasks” dropdown, then press “+” under “Custom scripts” to create a new custom script. Enter the following settings:
- Label: any label
- Run mode: Interval
- Interval: your specified interval for data logging, for example 15m for 15
minutes - Commands: “python etc/config/scripts/main.py”
- Maximum memory: 500MB
- Sandbox: unchecked
Save these changes, then click “Scan now” to sync your device’s settings with the template. Once the device reboots with the updated settings, you should see data periodically stream into the Data Streams tab of Digi Remote Manager. To view data for one variable over time, click into the variable in Digi Remote Manager to see a graph. You can also export the data as a CSV or use Digi’s API to access the data and use it in your own application. Select the three dots and click “Edit chart” to adjust your chart’s title and axis bounds.

Conclusion
In this tutorial, we connected our Voltaic CORE Solar System to a Digi IX30 cellular router in order to send battery health data to the Digi Remote Manager. We can now track power input (solar panel voltage and current) and power output (battery voltage and battery current) and see how our device is performing in the Digi portal.
Leave a Reply