We recently launched a solar-powered LORAWAN Gateway for The Things Network in the Brooklyn Navy Yard. While The Things Network is open to everyone to use, the impetus to deploy the gateway was supporting FloodNet. FloodNet is deploying a network of sensors around New York City to gather more data about changes in water levels timed to storms, tides and other flooding events. Each of the sensors communicates its status to the network using LoRaWAN, the solar-powered gateway sends the data to FloodNet and then publishes it for the public to view and analyze.
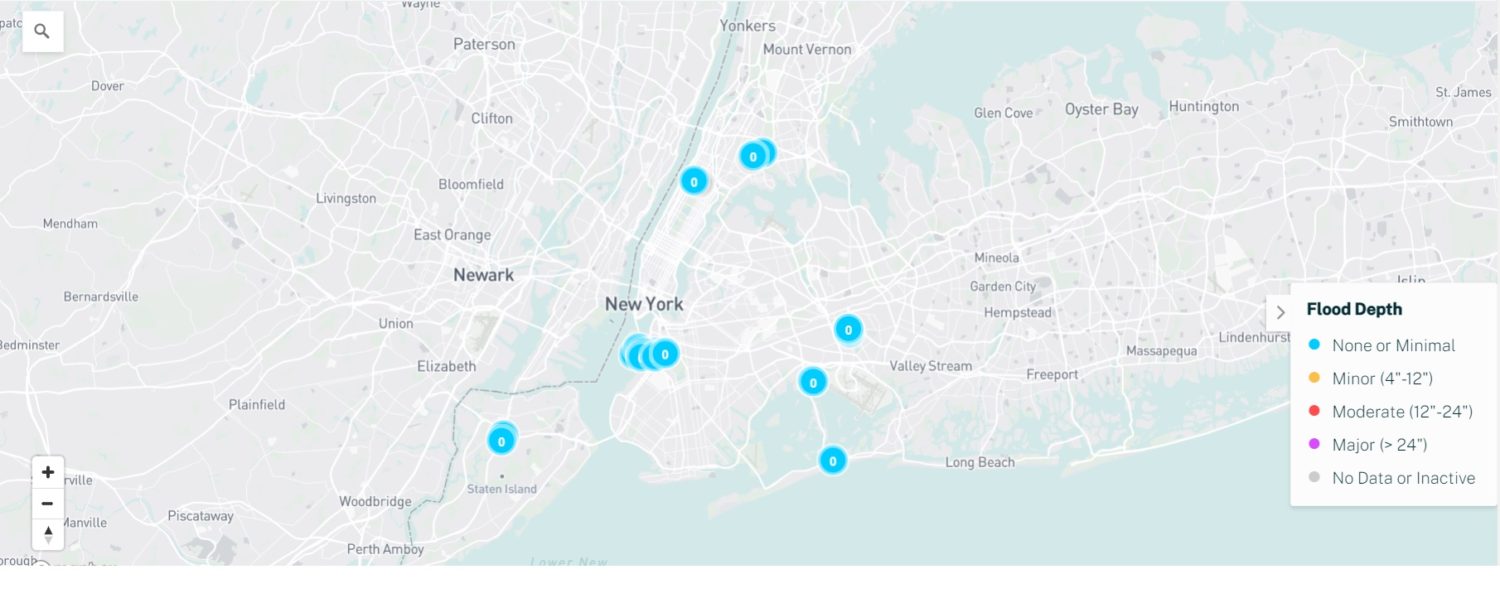
FloodNet reports water level data in real time.
Expected Power Consumption and System Sizing
Step 1: Measure Gateway Power Consumption
The MikroTik consumes 4.5 Watts continuously or 108 Watt hours per day.
Step 2: Select Panel(s) that Will Power System in Darkest Month
We needed to make sure that the system would stay running during the shortest days of the year in December. Our mount would face 45 degrees off due South because of the roof orientation. Based on our modeling tool, a 100 Watt panel would produce roughly 170 Watt hours of energy per day. Given losses into and out of the battery, we decided to double the solar power to 200 Watts. Likely over powered, but this was not a large cost driver on the system.
Step 3: Pick a Battery to Last Through Cloudy Periods
We need to plan for a week of dark, low hanging clouds where the panels generate little power. For the battery pack, we had a used 120Ah, 12V deep cycle battery in our office. Using 50% of that capacity would give us about 7 days of runtime with no solar power. (120Ah * 12V * 0.5 / 108Wh).
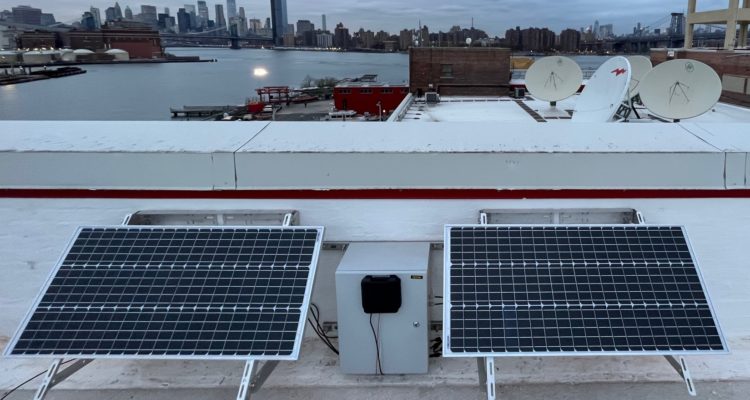
Solar Powered Gateway Parts List and Installation
– 2 x 100 Watt, 18V Solar Panels
– 2 x Mounting Brackets
– MikroTik LtAP LR8 LTE Gateway (with some modifications)
– 12V 120Ah Deep Cycle Battery
– Morningstar SunSaver Charge Controller
– Signalplus 12dbi Antenna
– Enclosure
– Stainless Steel Concrete Anchors
Once all the parts and permissions were secured, the installation of the panels, enclosure and battery was relatively straightforward.

Great views from the Brooklyn Navy Yard.
Connecting to the Things Network
The final step was to connect the MicroTik gateway to the battery and test connectivity. Charlie Mydlarz from NYU brought a pre-configured gateway for us. The gateway had to be mounted outside of the enclosure since the LTE antenna transmission would be blocked by the metal walls.

MicroTik gateway is mounted outside of the enclosure for better signal transmission.

Things Network gateway running off 100% solar power
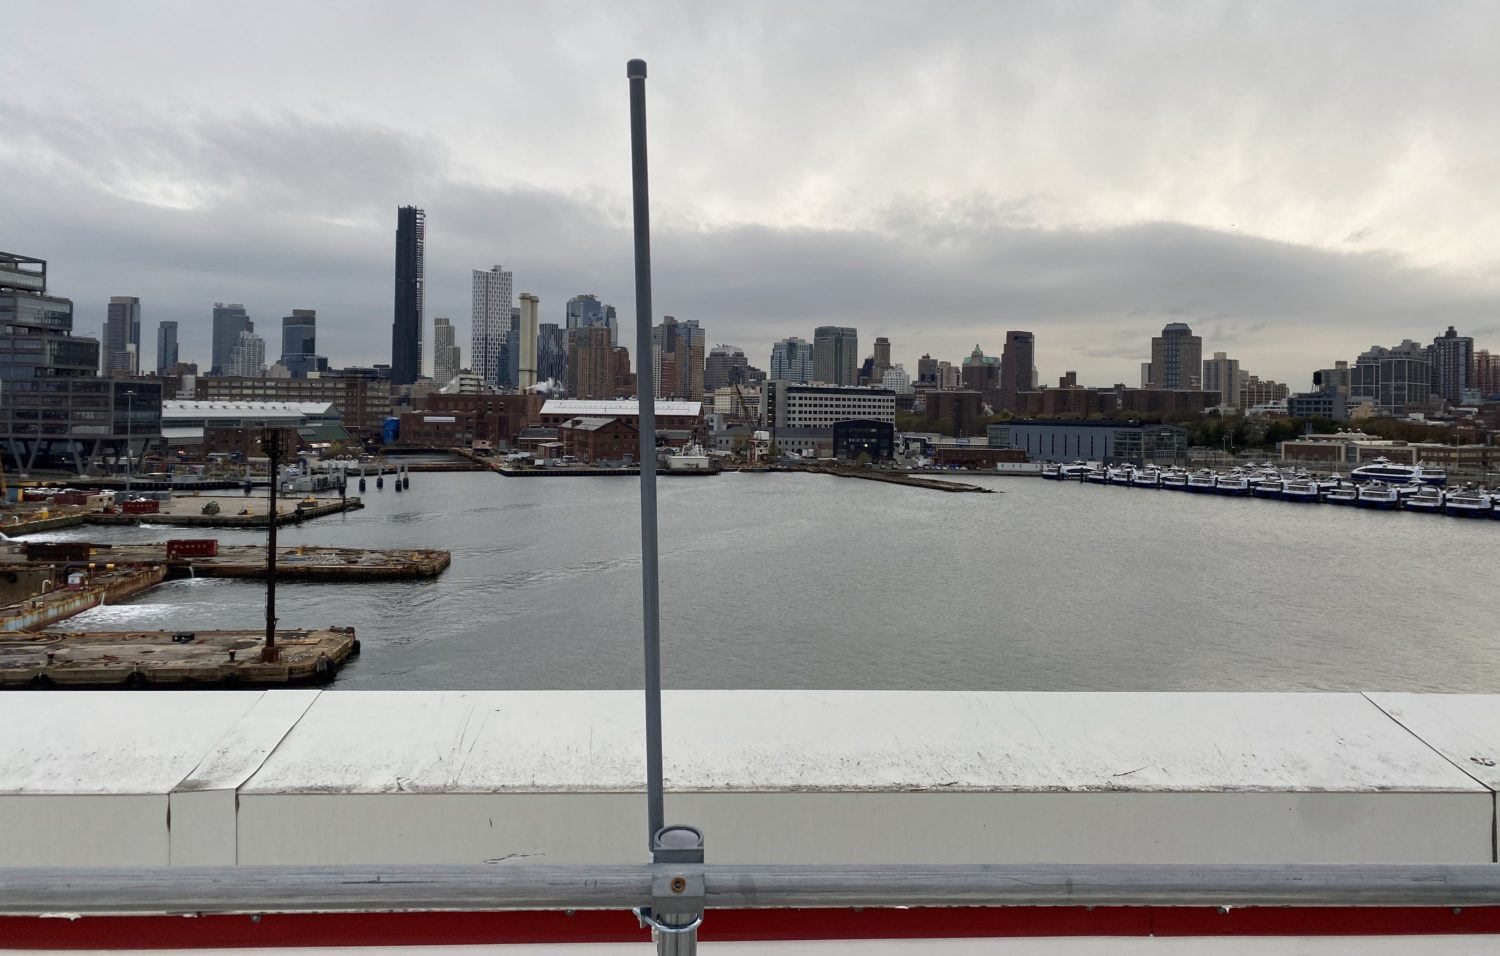
Antenna receives data from FloodNet nodes and other devices connecting to the Things Network
Measuring Charge Performance
We are able to track battery voltage out of the charge controller as well as solar intensity.
We are seeing the battery start the evening at 12.7 Volts and then drop down to 12.4 Volts over 14 hours at night. The battery then charges at its maximum rate (sometimes referred to as “bulk charging”) at 14.7 Volts before dropping down to 14 Volts (“float voltage”) in mid day once it is close to full.
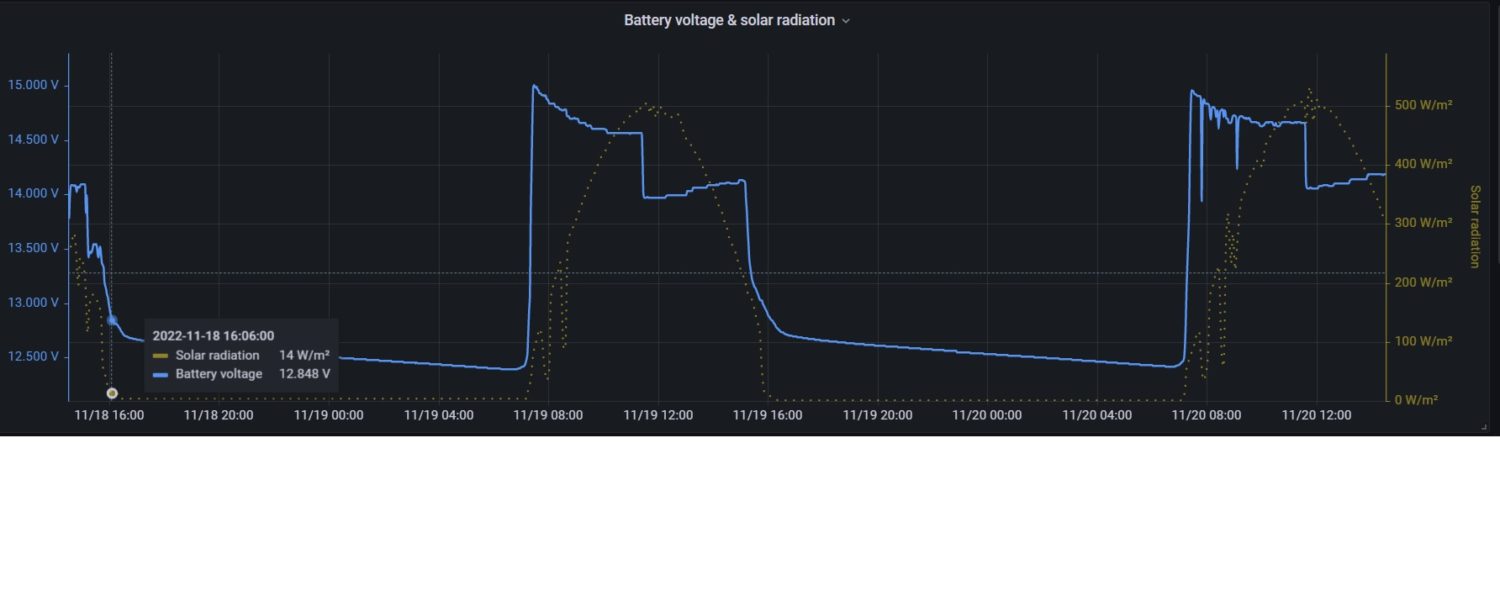 Voltage output of charge controller jumps up with sunlight and then shows actual battery voltage close to sunset.
We did not do a fully charge and discharge test on our bench power supply and load prior to installation. Our estimate is that the 0.3 overnight Voltage drop corresponds to ~25% of capacity, much more than expected for only 63 Watt hours of discharge (14h x 4.5 Watts). This particular battery was in storage for several years and may be operating at limited capacity.
Next Steps
We want to raise the antenna further above the parapet to increase range and map the signal strength in Brooklyn and across the river in Manhattan using a LoRa field tester. Voltaic is also going to connect some nodes powered by our battery-free Lithium Ion Capacitor solar chargers to the network.
Leave a Reply