Power consumption for Machine Learning applications have dropped to the point where they can run off batteries and relatively small solar panels. We show you how to run a simple audio recognition project offgrid using an Arduino PROTM Portenta H7, Edge Impulse, and a Voltaic Systems solar panel and IoT battery pack. All data is sent over LoRaWAN to a publicly available dashboard.
Project Details
- Collecting a dataset of traffic, background, and siren sounds
- Using Edge Impulse to train a machine learning model to recognize the sound of sirens
- Exporting the trained model and incorporating that model into an Arduino program
- Characterizing the power consumption of the Portenta H7
- Selecting an appropriate solar panel and battery
- Sending data to the The Things Network (TTN) and displaying data in a Qubitro dashboard
This is not intended to be a detailed tutorial on machine learning. We’re more interested in the power requirements of a real world machine learning IoT device.
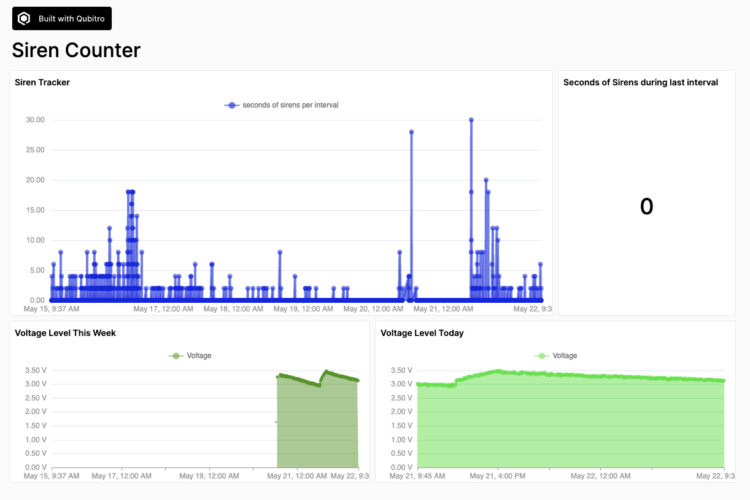
The Qubitro dashboard below shows the number of seconds the Portenta records and identifies a sound as a siren during a 4 minute interval. When testing the device inside with sound files, the model is very accurate.
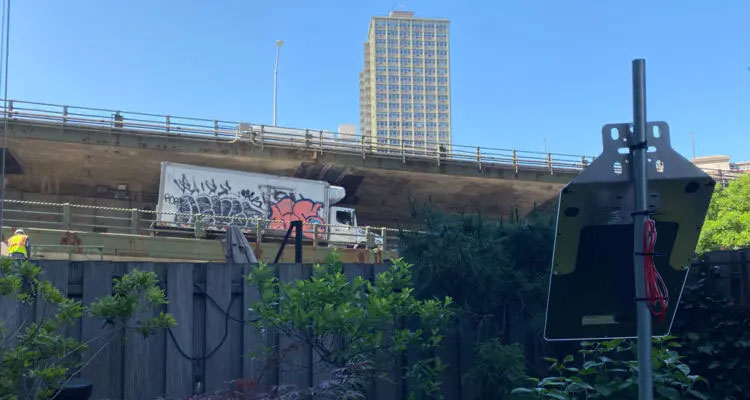
The device is currently deployed pretty close to the BQE and Brooklyn Bridge in the Dumbo neighborhood of Brooklyn and is recording and processing quite a few sounds. I suspect the accuracy is less than perfect, but probably not too far off. As anyone who has heard the sounds of the BQE can attest, it’s a noisy place and sirens from ambulances, police, and firetrucks are common. But even with all the activity, a firehouse nearby, I suspect that the device is registering some truck horns as sirens.
I do think it is interesting that between 1 am and 9:16 am on May 21, the device did not detect anything similar to a siren as that section of the BQE is relatively quiet during those hours.
Parts
Hardware
- Portenta H7
- Dipole Pentaband Waterproof Antenna
- Portenta Vision Shield
- V50 USB Battery Pack V50
- 10 Watt 6 Volt Solar Panel – ETFE P110
- Solar Panel Bracket- Large BK103
- Medium Solar Ready Enclosure
- Type C Connector 24 Pins Male Plug Socket Receptacle Adapter to Solder Wire
Software
- Arduino IDE
- Arduino CLI
- Edge Impulse CLI
- Python
- TTN Account
- Qubitro Account
The Board
 Portenta H7 is a dual-core microcontroller board. While the board follows the Arduino MKR form factor, it comes equipped with two 80-pin high-density connectors for additional functionality, like incorporating machine learning.
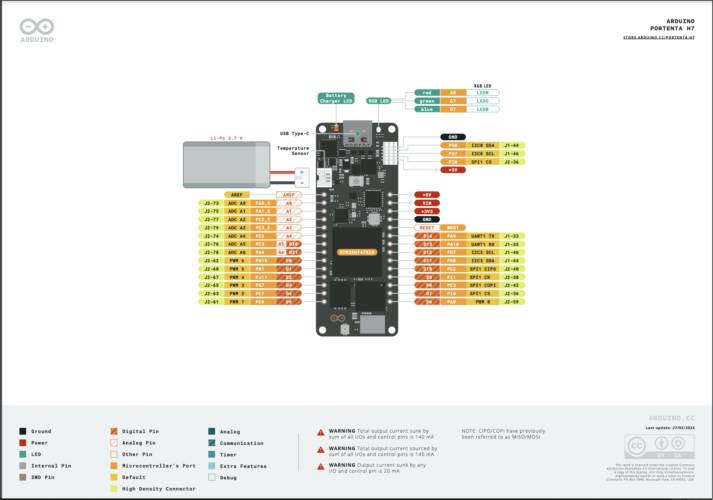
https://docs.arduino.cc/resources/pinouts/ABX00042-full-pinout.pdf
The board also includes a Murata 1DX module that provides dual WiFi 802.11b/g/n up to 65 Mbps and Bluetooth® connectivity. 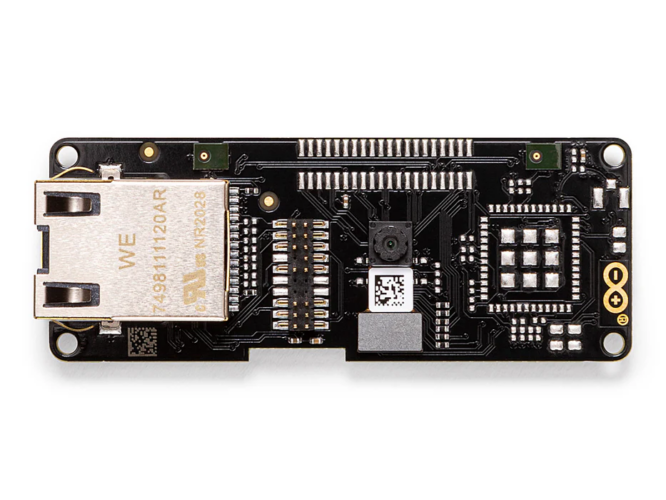
The Portenta Vision Shield is an add-on module that provides two MP34DT05 MEMS digital microphones and a camera to support data capture and analysis. It is designed to complement the Portenta H7 board and is targeted at industrial automation, surveillance, and IoT applications.
Getting Started
To get started with machine learning, you’ll need to follow these steps to setup your board and test your connection :
- Connect the Vision Shield with LoRa Connectivity to the Portenta H7 board.
- Attach the antenna.
- Open the Arduino IDE.
- Add the Arduino Mbed OS Portenta Boards.
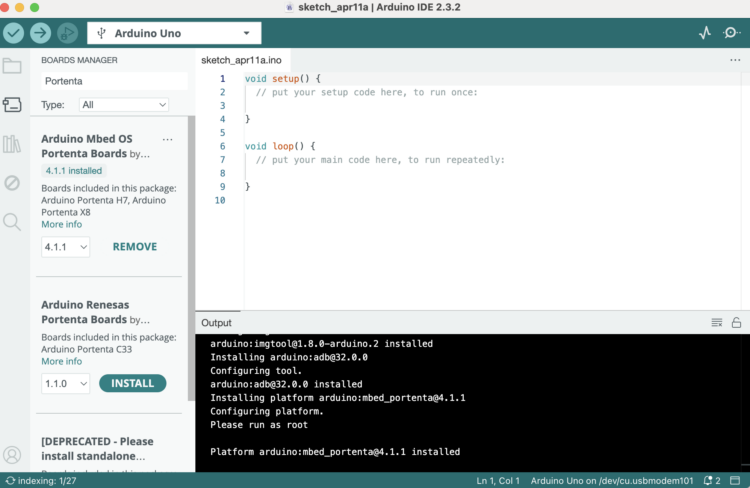
Arduino IDE
- Connect the board to the computer through a USBC-USBC cable.
- Open the File > Examples > MKRWAN > MKRWANFWUpdate_standalone sketch. Upload and open the Serial Monitor and wait for the update to be confirmed.
- When the update finishes running, open File > Examples > MKRWAN > FirstConfiguration.
- In the code, change the regional band to the appropriate code. I’m in the US, so I’m using US915.
- Run the sketch.
- Open The Things Network and log into your account.
- Create an Application or add this device to an application.
- To add the device, select Register End Device.
- For Input Method, select Enter end device specifics manually.
- Select your Frequency plan.
- Select the LoRaWAN version. I selected 1.0.3.
- Navigate to this page: https://descartes.co.uk/CreateEUIKey.html to select a random EUI and use the returned value for the Join EUI field.
- You’ll find the DevEUI in your FirstConfiguration Arduino program. Copy and paste it into the field.
- Click Generate to create an AppKey.
- Click on Register end device.
- Back in the Arduino program, enter 1 and press return.
- Enter the AppEUI and AppKeys when prompted.
- If all goes well, try sending uplink and downlink messages between the Portenta H7 and your TTN application with the LoraSendAndReceive sketch from the MKRWAN library.
Machine Learning with Arduino Portenta H7
ML with Edge Impulse
- You need to start with a collection of sound files. In this case we will use sirens, background,and traffic noise (non-siren sounds) sound files. You can find the collections at kaggle.
- Login to my Arduino Cloud account and click on Integrations.
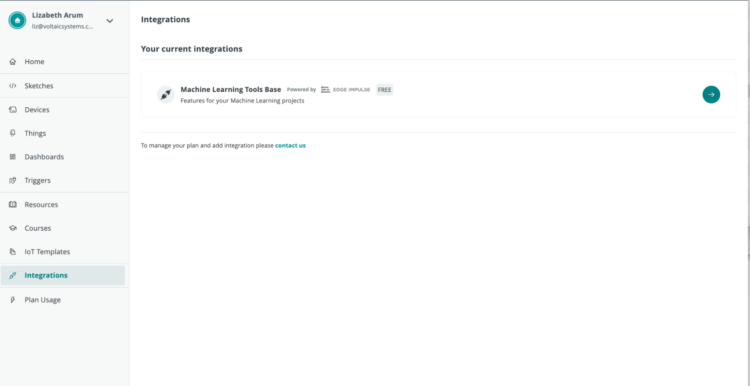
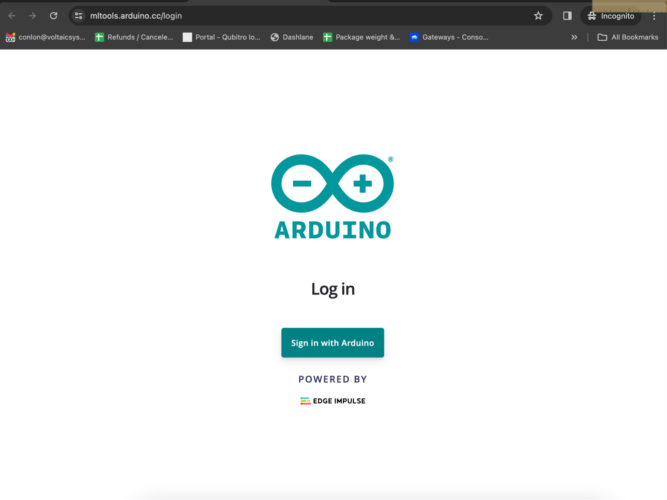
- Select the Machine Learning Tool Base and click on the Sign in with Arduino button:
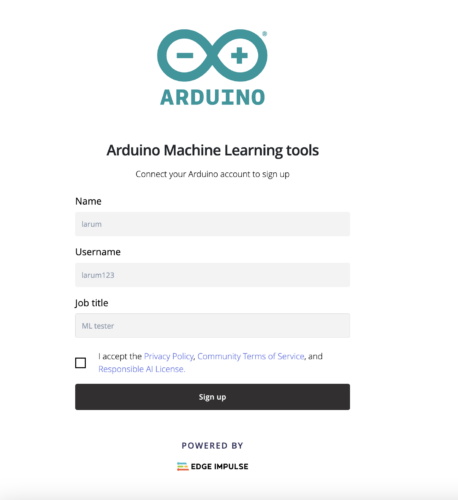
- Create an ML account:
- After signing up, return to the cloud, click on integrations and machine learning, and then click on the button:
- Go to your profile and check settings. If necessary, add your password, which will be necessary in a few minutes.
- Rename project by clicking on the pencil/edit button:
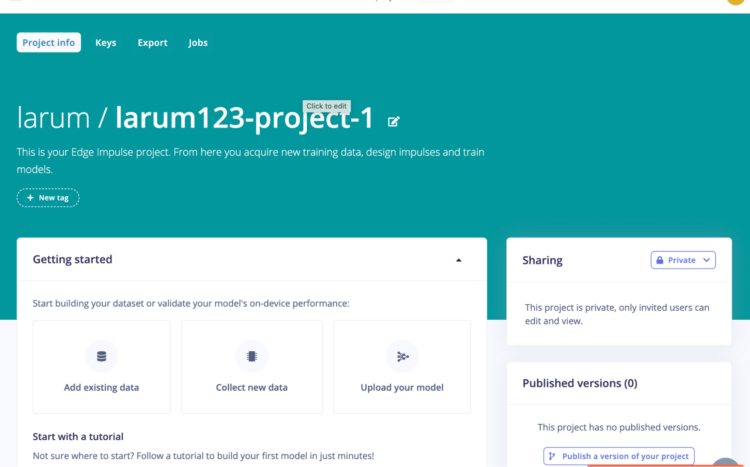
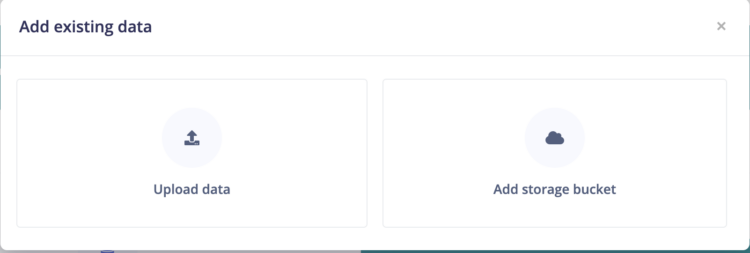
- Click on the Add Existing Data button:

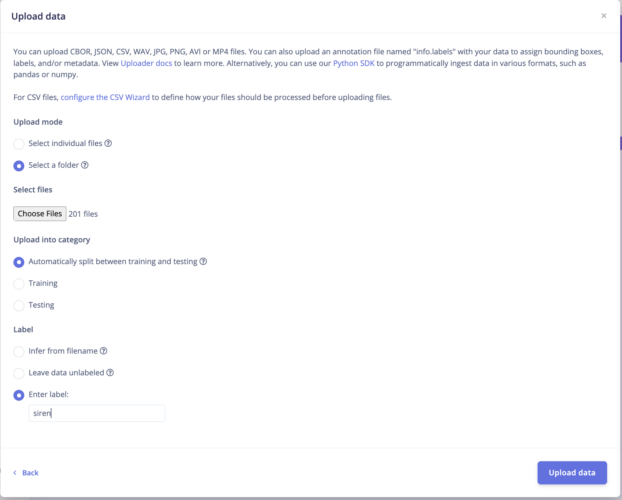
- Then clicked on Upload data:
- Select your siren folder and complete the information. Make sure you add the label:
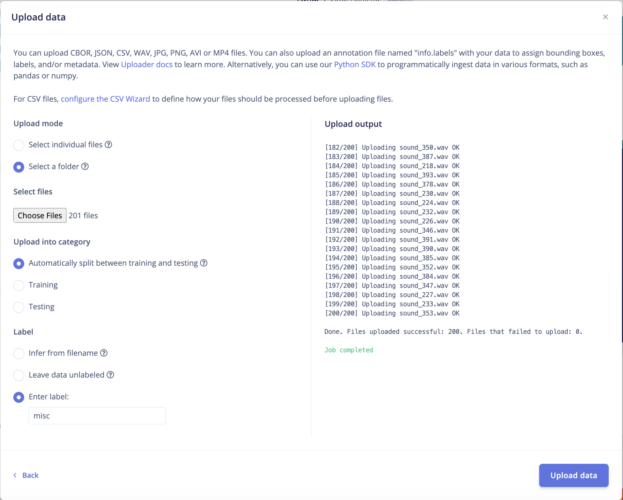
- Do the same for your non-siren files:
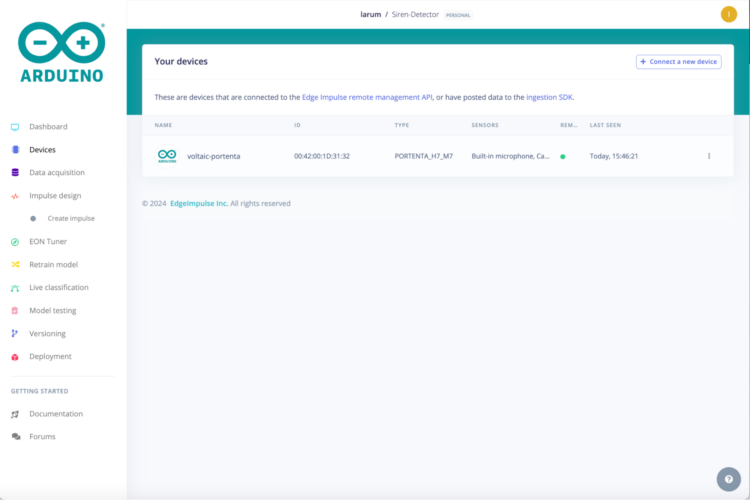
- Click on Devices:
- Connect the Portenta H7 board to your computer through a USBC – USBC cable.
- Download the latest Edge Impulse firmware and unzip the file.
- Double press the RESET button on the board to put it in bootloader mode.
- Open the flash script for your operating system. In my case, the flash_mac.command. Double-click on it to flash the firmware.
- Wait until the flashing is complete and then press the RESET button on the board once to launch the new firmware.
- Install edge-impulse-cli. For mac users, this is easier to do on an Intel mac than on a M1. I found that the key to the error command not found was actually to restart my device. Another solution I found on a different computer was to switch to a zsh shell:
[code] chsh -s /bin/zsh[/code] - Install the Arduino CLI. Here are the instructions. For my installation, I used Homebrew.
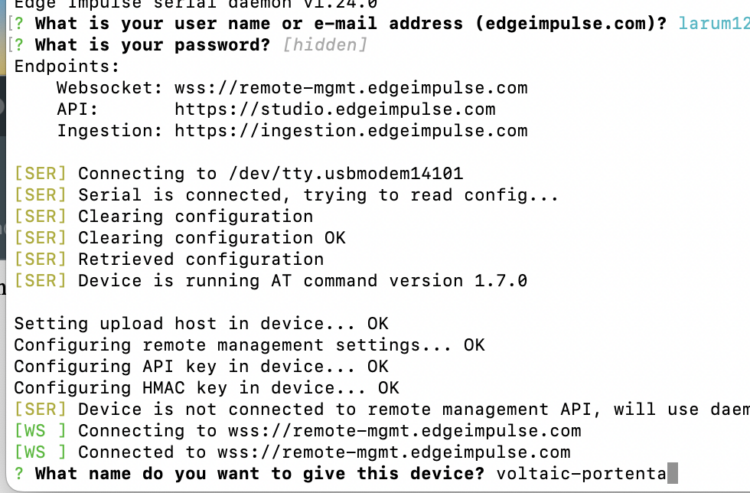
- If you are on a Mac, open Terminal and type: [code]edge-impulse-daemon[/code]
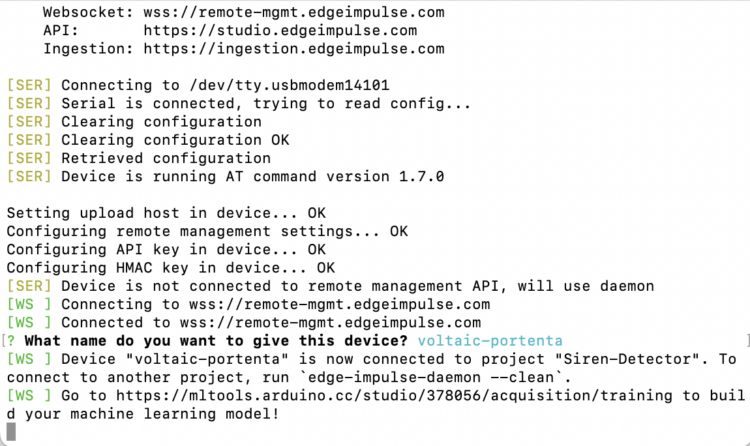
- Provide your credentials and name your device:
- Once the daemon finishes, return to the Arduino cloud to see that your device had been added:
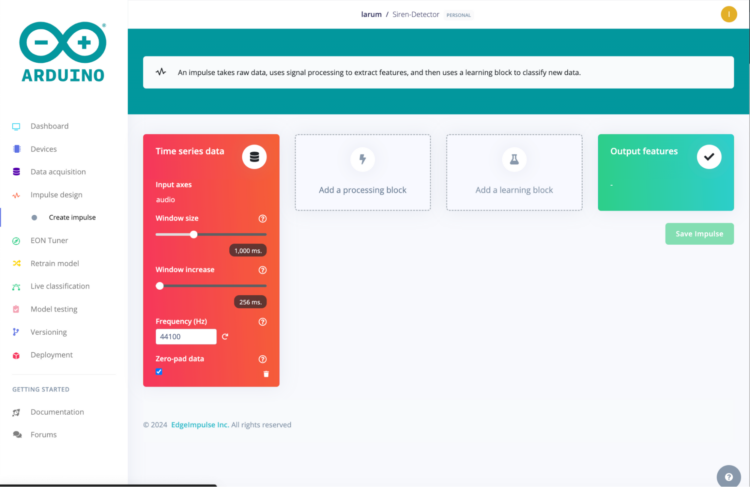
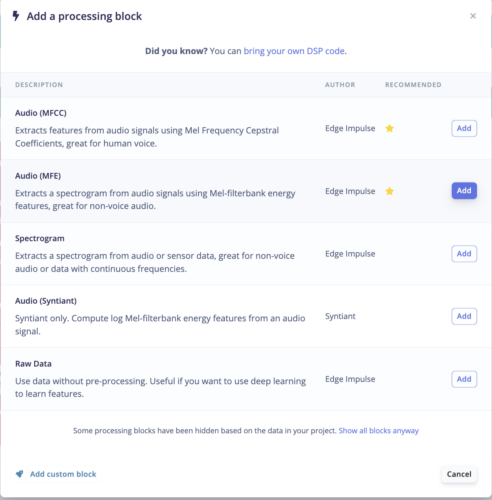
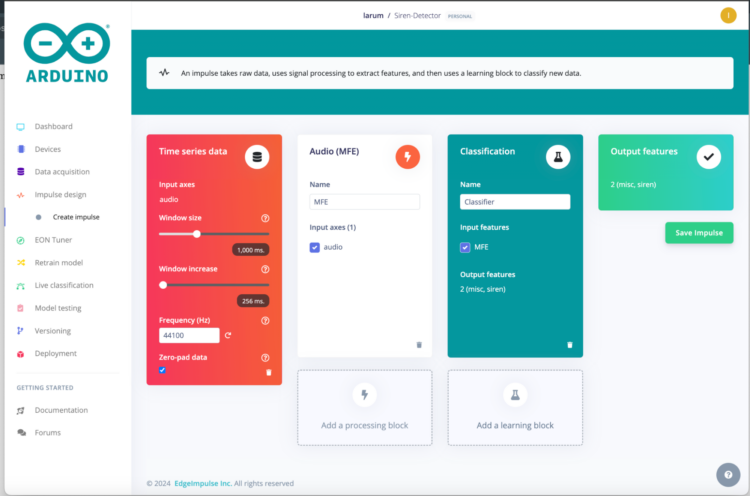
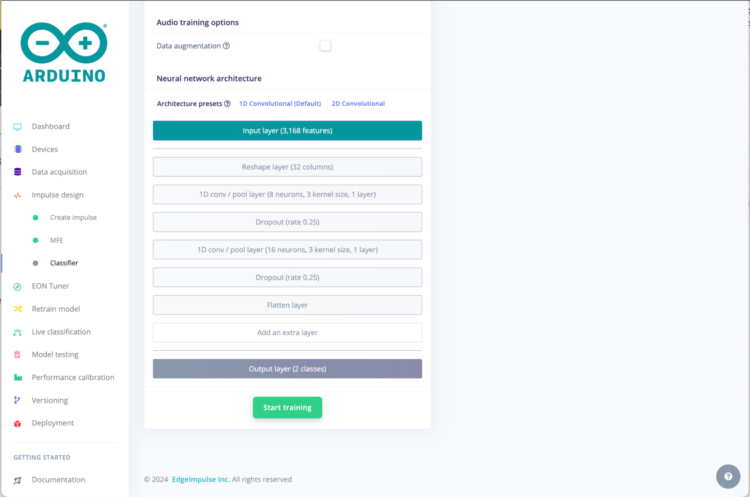
- Click on Create Impulse. Reduce your window size and click on Add a processing block:
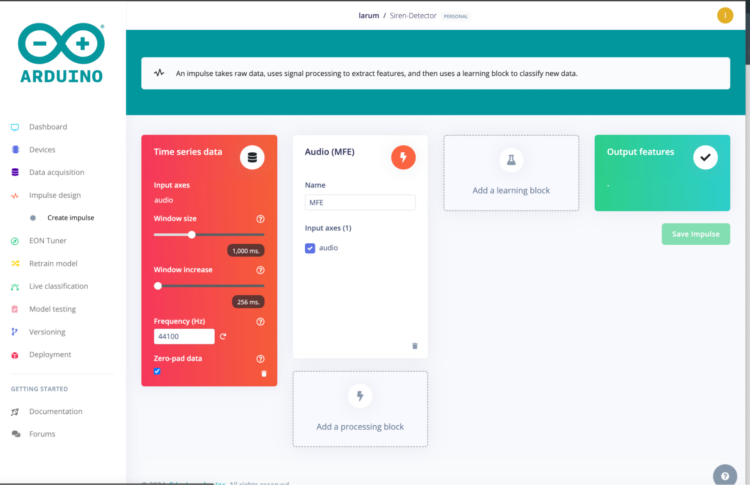
- Select MFE:
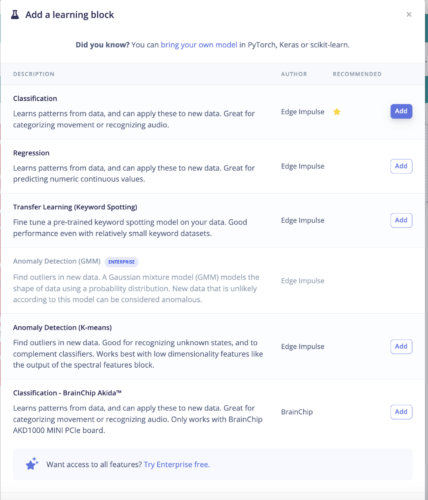
- Click on Add a learning block:
- Select Classifier:
- Click on Save Impulse:
- If the final program does not quite classify the sounds correctly, return here and adjust the frequency. You can also adjust the window size to ~100ms:
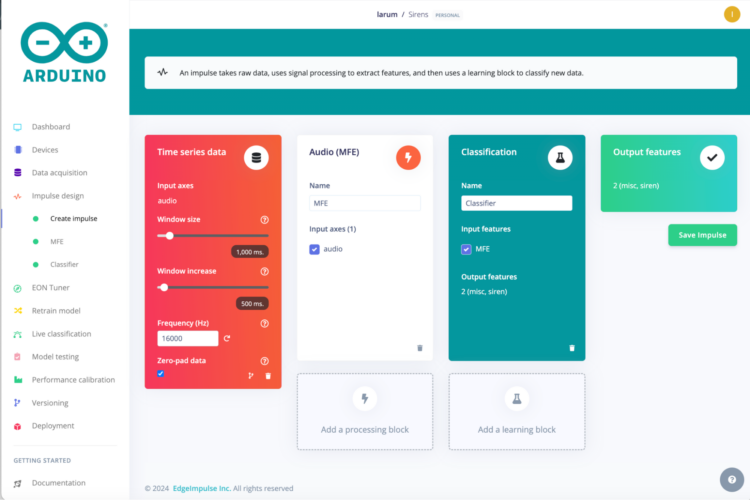
- Click on MFE, adjust your parameters, and save them:
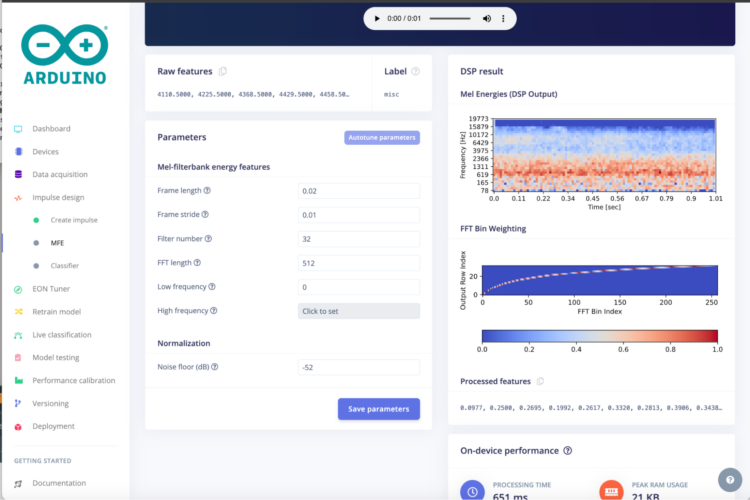 Upon revisiting the setup after faulty classification, I lowered my FFT to 256:
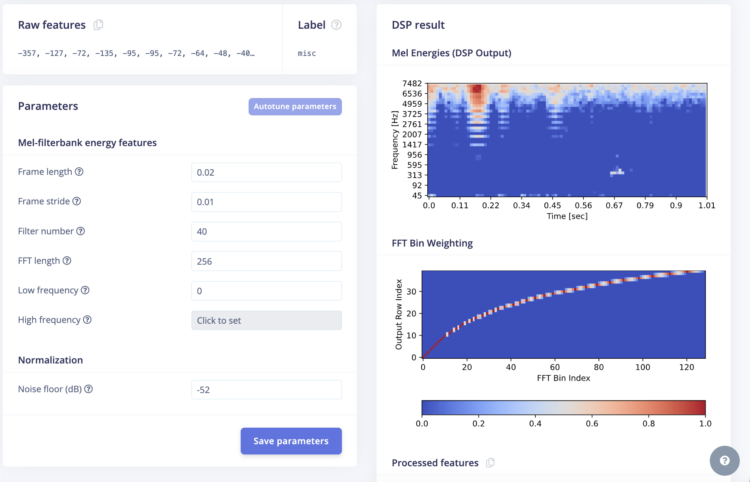
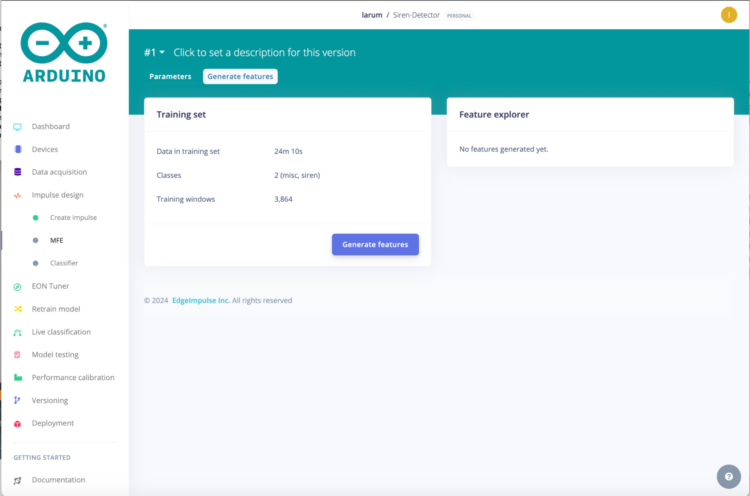
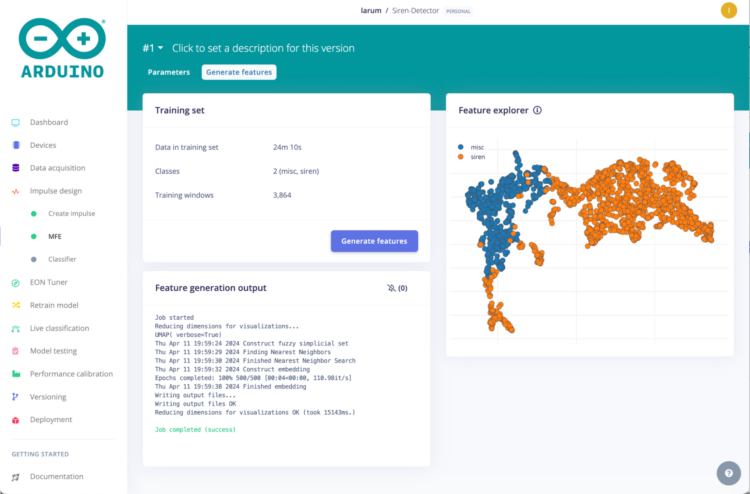
- Click on Generate features:
- Click on Classifier:
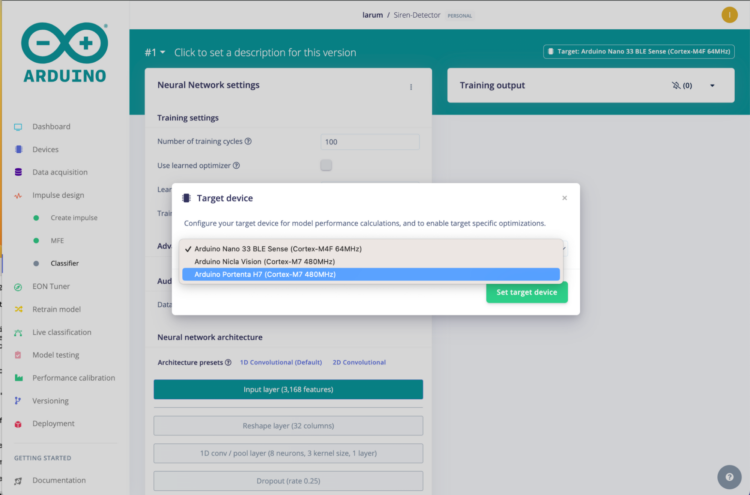
- In the top right, click on the Target button and select your Target device:
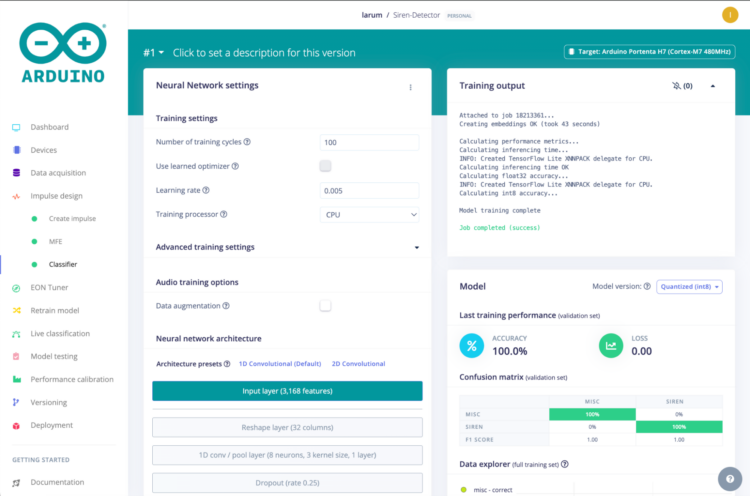
- Click on Start Training/Save & Train:
- Click on Model Testing and Classify all:

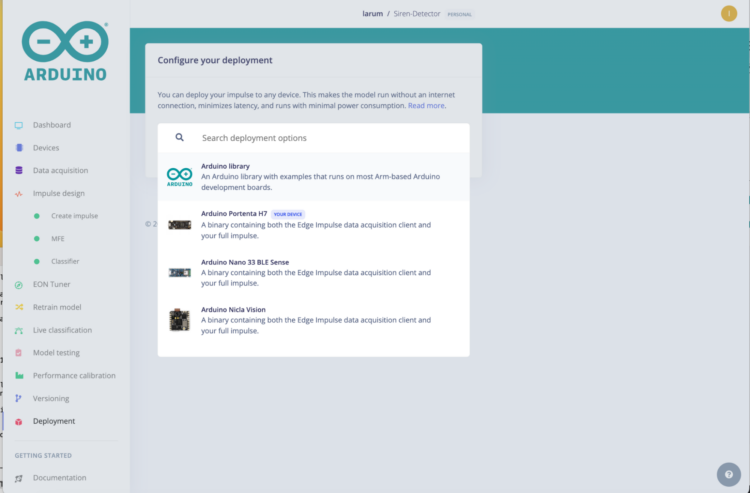
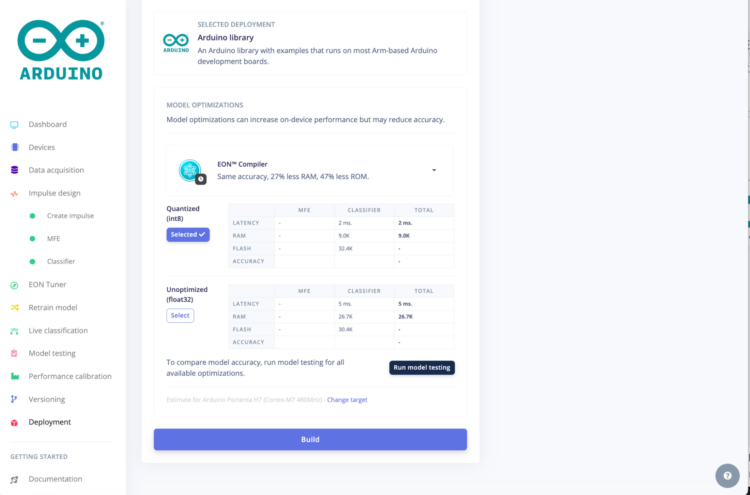
- Switch to Deployment and select the Arduino library option:
- Click Build:
- Open the Arduino IDE and add the zipped file by selecting Sketch>Include library>Add .ZIP library.
- Open the Portenta H7 microphone example from the siren-detector library and compile the program. It will take much longer than usual to compile, but only the first time.
- Add your LoRa code and connect TTN to a dashboard.
Machine Learning in Action
I added a threshold of .994 to my Arduino code:
[code lang=”arduino”]if (!captureFlag) {
for (uint16_t i = 0; i < EI_CLASSIFIER_LABEL_COUNT; i++) {
ei_printf(" %s: ", ei_classifier_inferencing_categories[i]);
ei_printf("%.5f\r\n", result.classification[i].value);
if (result.classification[1].value > .994) {
sirenCounter++;
ei_printf("counter ");
ei_printf(" %d: ", sirenCounter);
ei_printf(" %s: ", ei_classifier_inferencing_categories[1]);
ei_printf("%.5f\r\n", result.classification[1].value);
}
}
captureFlag = 1;
}[/code]
Once you set your threshold, you can test your model by running the Arduino program and playing some sound files:

Fire truck siren US passes test
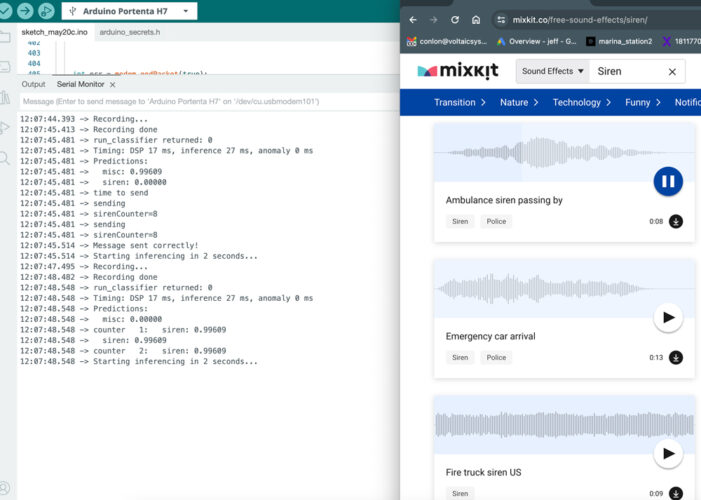
Ambulance siren passing by passes test
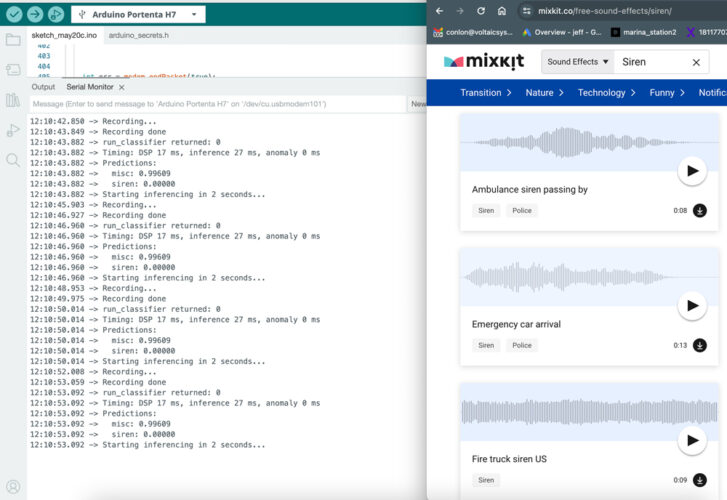
Silence does not pass test

Urban park and traffic does not pass test
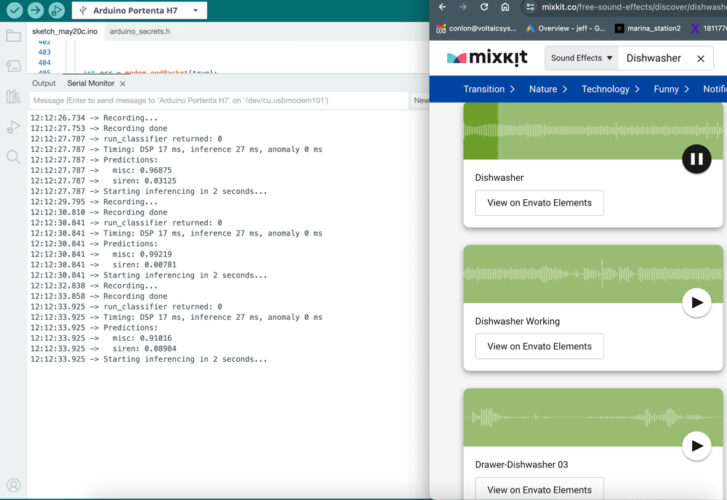
Dishwasher does not pass test
Power Consumption of Solar-powered Machine Learning System
Characterize your power consumption with a USB Digital Multimeter:
Based on my readings, my board consumes around 0.106Ah or a little under 13Wh daily.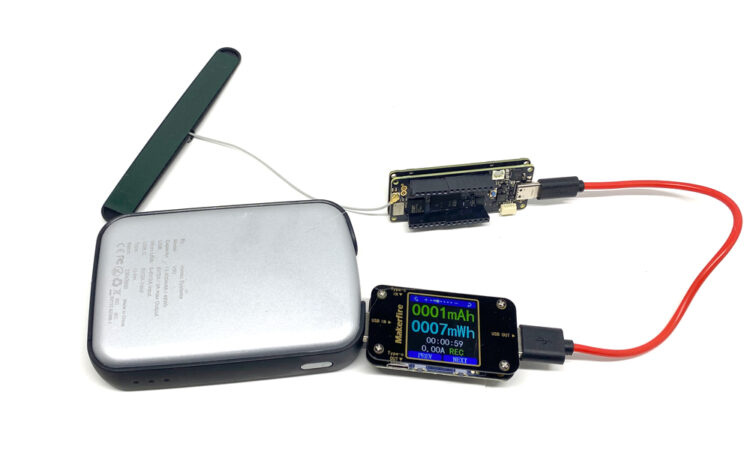
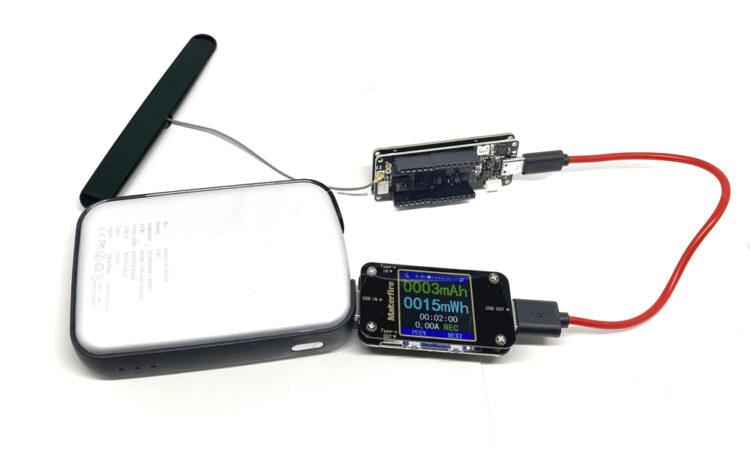 [code]15mWh * 30 minutes =.045Wh per hour * 24 =10.8Wh[/code]
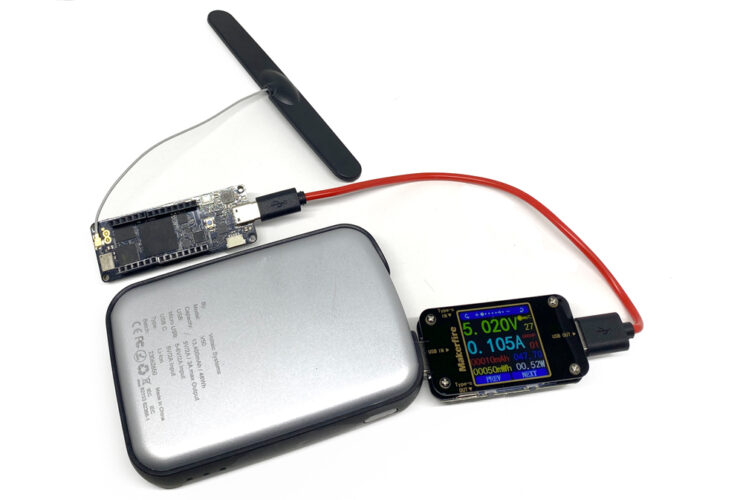 [code]0.105Ah * 5V= 0.53Wh *24 =12.72Wh per day [/code]
Based on the power consumption, I chose the following battery:
- V50 USB Battery Pack V50 (about 3 days of runtime with no sun)
- 20 Watt 6 Volt Solar Panel – ETFE P120 – will produce about 40 Watt hours per day on average, even in the winter, but building shading can cut that down significantly
Leave a Reply