NYU’s Interactive Telecommunications Program (ITP) is a two-year graduate program that has been described as both an art school for engineers and an engineering school for artists.
Voltaic Systems has supported students from Jeff Feddersen’s ITP Energy class over the years. Last year the class visited the office and warehouse and one student used Voltaic products for his Wind-Vane-Cam.
However, this year was different. With the approval of NewLab, which is located in the Brooklyn Navy Yard and is home to the Voltaic Systems office, we were able to offer small solar panels and Always On battery packs, as well as, but more significantly, project space for the Energy 2024 class. While some might balk at exhibition space next to a garbage skip in a parking lot, outside project space is in short supply. What Voltaic Systems and NewLab offered the ITP students was space for students to install, test, and iterate on their ideas over time.
Feddersen came up with a preliminary sketch for how the “SkyLab” projects could be displayed. He visited the site to assess the sun’s path and he made a plan for incorporating the “exhibition” space into the spring syllabus.
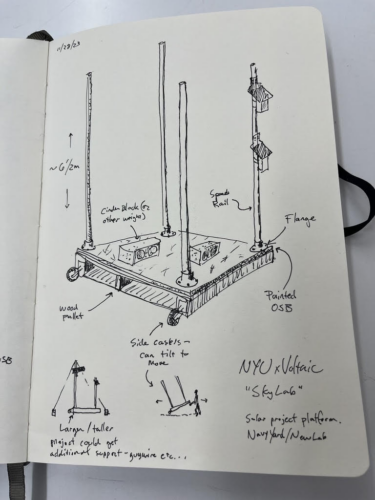
Jeff Feddersen’s original idea
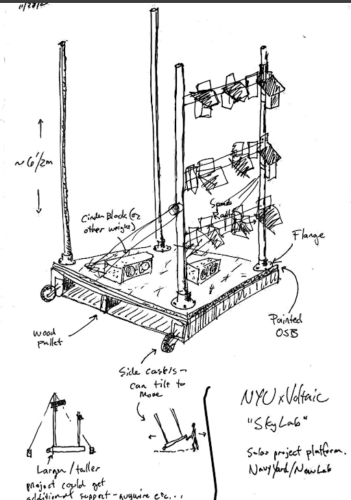
Voltaic’s suggestions
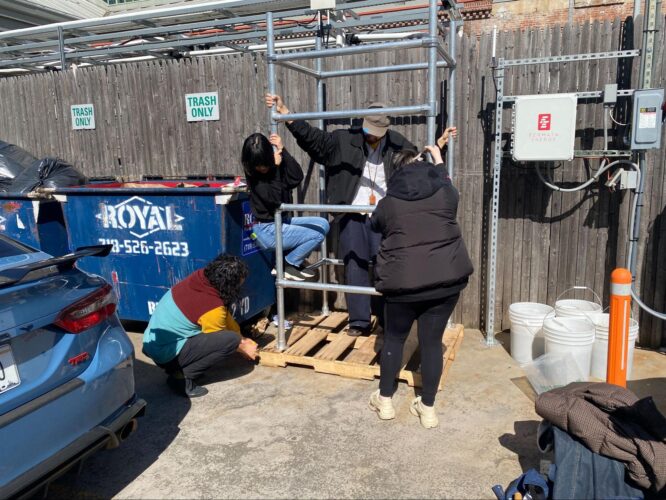
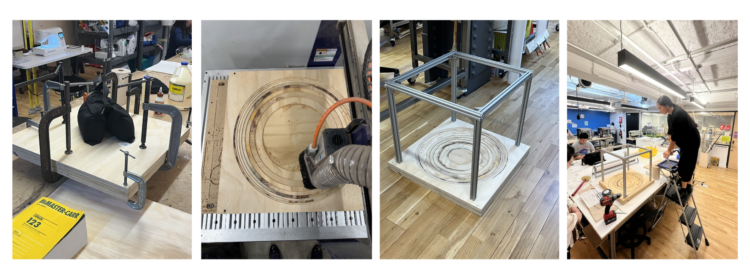
Students assembling SkyLab structure
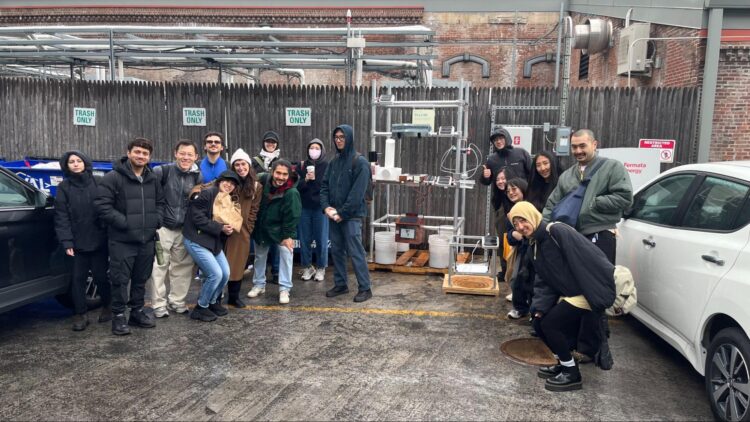
Onsite presentation on April 18
Starting in week six of the Spring semester, the students of the ITP Energy Class divided themselves into teams to create “off-grid” projects powered by solar. These projects were required to:
- Run continuously for 5 or more days on solar power.
- Mount securely to a structure and survive outside.
- Report, at a minimum, status information such as battery and/or panel voltage to a central data site.
- Run a payload of their design – this could be a sensor, art installation, or really anything, as long as students had a realistic energy budget for the payload and it was matched to the available solar power.
The first time the class met onsite was on March 7. The initial idea was to keep the projects small and have them completed by April 4. However, in keeping with ITP tradition, the projects became bigger, weirder, and more ambitious. It soon became apparent that more time would be needed to do these projects justice. SkyLab transformed from a quick mid-semester assignment to the final class project with an onsite presentation followed by a final in-class presentation two weeks later.
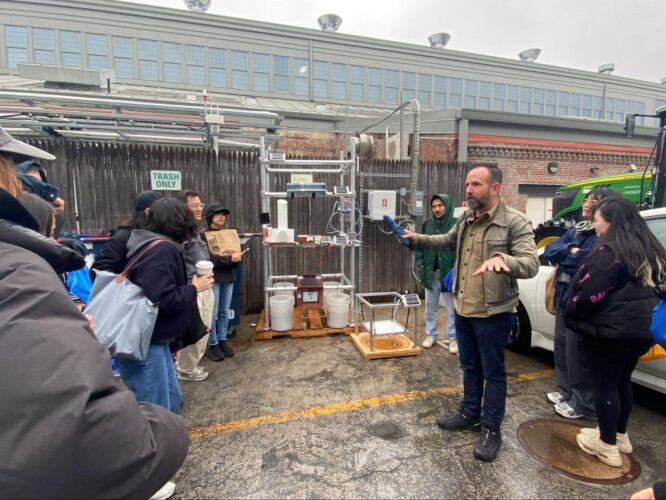
April 18th’s class and another day in the rain
In addition to team projects, each student was required to take on an additional role, participating in one of four groups to support SkyLab.
Group names and descriptions:
- Data & Documentation: This group analyzed the site for energy potential and shading issues; and provided photos and videos for ITP social feeds and class documentation.
- Support Structure Construction: This group was in charge of the structure that supported the projects safely outside for the duration of the project.
- Equipment & Coordination: This group interfaced with Voltaic, Feddersen, and the department on equipment needs, and was the point of contact for scheduling time on site.
- Networking: This group ensured that all projects on site could report data.
While the objectives for the course were what you might expect from an energy class, the final projects were anything but.
Course Objectives
- Appreciate the sun as ultimate origin of almost all terrestrial fuels and energy sources
- Touch on nuclear fusion and fission
- Know the value of the solar constant and AM1.5 solar flux value
- Learn basics of photovoltaic (PV) conversion of light to electricity
- Learn about specific materials and considerations that affect PV
- Learn about emerging technologies in PV such as perovskites and quantum dots
- Learn about the difference between grid-tied and off-grid PV
- Learn about the additional components needed for both types of PV
- Learn about energy storage in batteries
- Apply energy storage concepts from capacitors to batteries (specific energy, etc)
- Learn about different battery chemistries and other factors that affect battery performance
- Learn about grid-scale battery energy storage
- Learn about grid-scale PV installations
- Appreciate difference between PV and solar-thermal power
- Build a realistic power budget for a project
- Apply methods for reducing the energy consumption of your projects
- Design projects that tolerate intermittent or irregular power supplies without faults
- Design a project that can realistically survive outdoors
- Test solar panels using concepts of OCV and SCC
- Understand MPP in PV and Jeff’s rule-of-thumb for MPP
Power Consumption
Students measured and tested their components in the lab and then deployed their projects on SkyLab. In the process they learned about the challenges of solar-powering projects: Power is weather dependent and the systems need to survive consecutive cloudy days, rainy days, shade from pre-existing structures, mounting challenges, and connectivity issues.
Each group developed a daily energy budget for their project.
| Project | Current | Watts | Wh per day |
| SunWatcher 1 | 0,03-0,04A | 0,15W | 3,6Wh |
| LumiQual | 0.00015A, 0.08A | 0.40075W | 1.75Wh |
| Take Me There | 0.380A, 0.02A | 1.9W, .1W | 21.24Wh |
| Crack of Dawn | 0.21A | 1.062W | 25.4Wh |
| Light Room | 0.145A | 0.725 watts | 17.4Wh |
| Light Room’s Beam circuit | 0.04 amps | 0.2 watts | 4.8Wh |
Figures do not account for the battery’s Always On mode’s self consumption of 7mA.
For the projects that were underpowered, they ran until the batteries were depleted and then sporadically awoke in fits and starts when the panels produced power. System failures provided insight into why properly sizing a system is important.
The Projects
Project Name: SunWatcher 1
Designers: Henrique Stockler and Zongze Chen
Project Description:
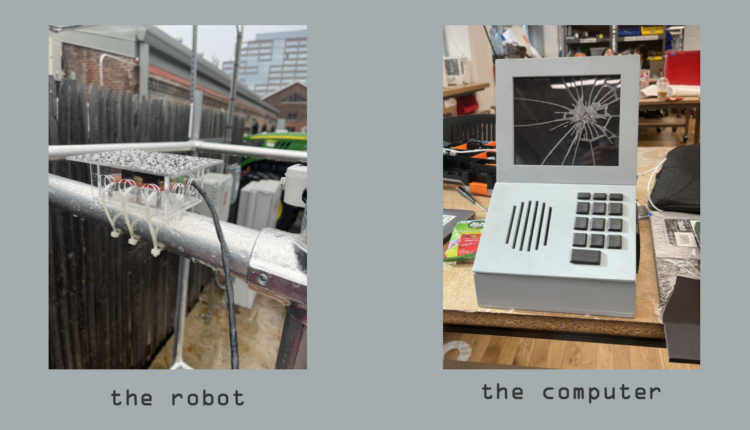
SunWatcher 1 is a tiny robot that reports weather data from the eerie depths of the parking lot at the Brooklyn Navy Yard to the ITP Floor.
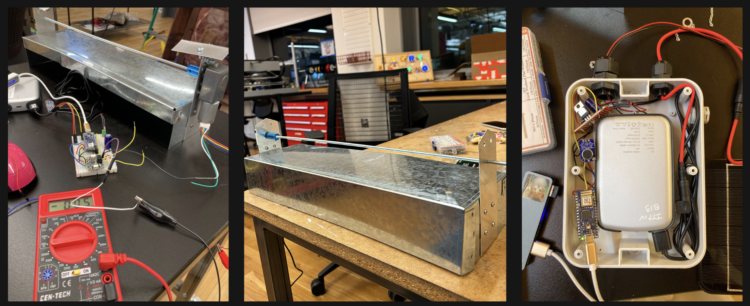
The project is made of two parts: the robot and the computer. The robot has four weather-related sensors and sends its report over the Internet to the computer that sits on the ITP floor, which live streams it, and prints it on thermal paper.
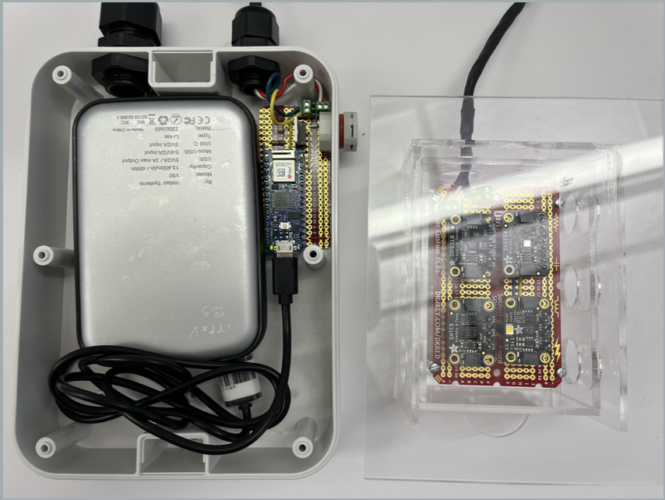
Arduino Nano 33 IoT installed in Small Solar Ready Enclosure
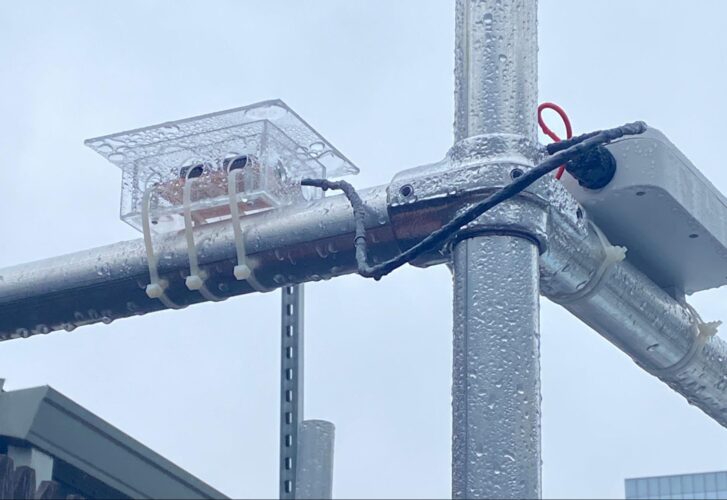
Circuit survived the elements throughout the duration of the two-week installation
Project Name: LumiQual
Designers: Yizhi Liu and Sao Ohtake
Project Description:
The project is an air quality detection sensor light that is powered by a solar panel. The outdoor air quality sensor is solar-powered and uploads data every ten minutes. The indoor sensor light illuminates when touched, and displays the current air quality using different colors.
[The] concept involves creating an indoor indicator light that syncs with a solar-powered air quality sensor. Imagine living in a post-apocalyptic world where a personal air quality monitor becomes critical, helping individuals make informed decisions about their environment. The user-friendly design ensures that the light illuminates various colors with a simple tap; each color signifies different data readings. [The team] chose a light for data display to offer a rapid, intuitive, and straightforward method of understanding air quality at a glance.

Circuit with Adafruit’s NeoPixel Jewel below the lucite cube

Project installed onsite
Project Name: Solar Instrument
Designers: Sarah Mok and Nakyung Youn
Project Description:
Solar sound sculpture, composes audible tunes influenced by the direction and intensity of sunlight.
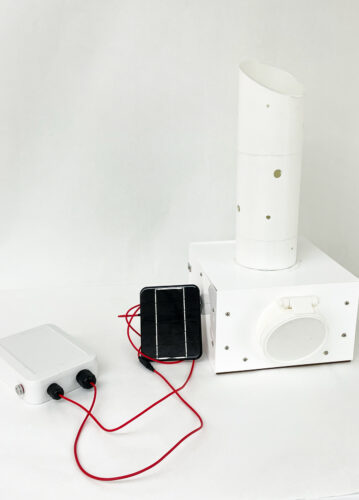
Studio shot of architecture-inspired instrument
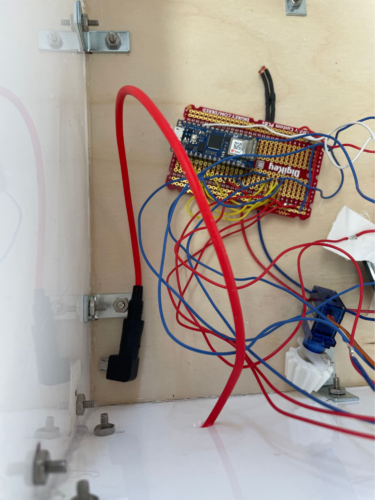
The circuit with an Arduino Nano 33 Iot at the center
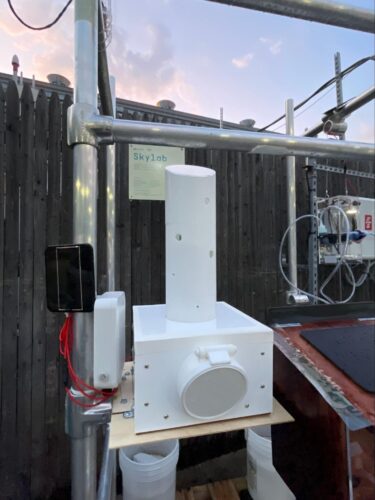
The instrument installed
Project Name: Rainshine
Designers: Jo Suk and Anvay Kantak
Project Description:
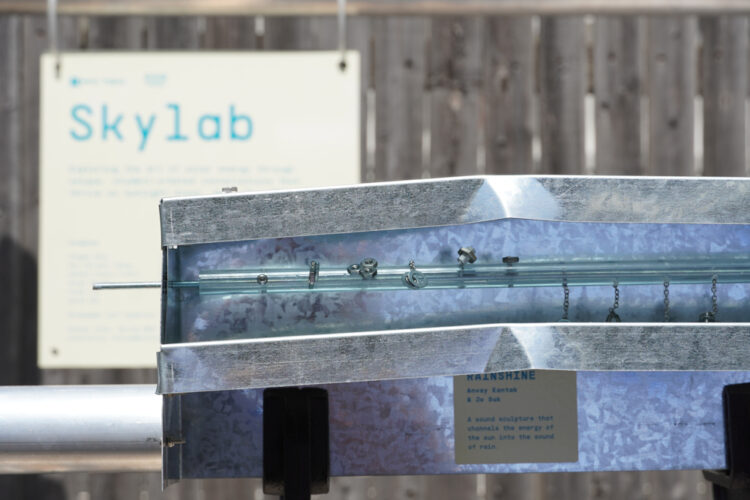
A solar-powered sound sculpture that emulates the sound of rain.
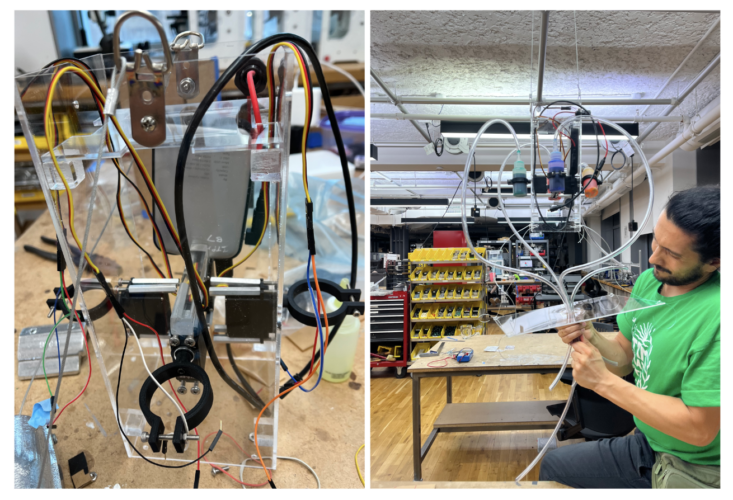
It is a sound sculpture that uses solar power to bring nature’s tranquility into urban spaces. It uses a solar panel connected to a microcontroller, with attached volume sensors that senses the surrounding noise level. A connected motor spins inside a metal structure when the on-site volume drops below a certain point. Attached to this motor is a metal rod with various small objects making different sounds. As the motor turns, these objects drop onto a metal base, mimicking the sound of raindrops hitting a tin roof.
Rainshine in lab

Rainshine installed onsite
Rainshine detail
Project Name: Take Me There
Designers: Kai (An-Kai Cheng) and Chumou Zhang
Project Description:
This project captures solar and kinetic energy to measure the migration distances of hummingbirds. [The] data visualization component further analyzes the energy expenditure of these birds during their migration, providing key insights into their energetic needs!!⚡️
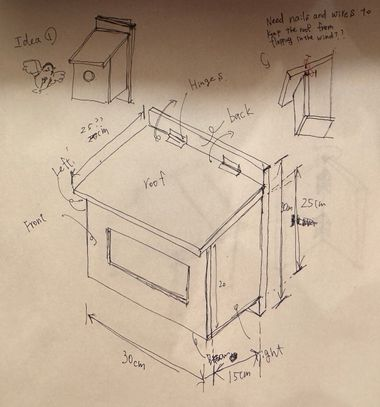
The initial sketch
3D model for mounting projects on speed rails
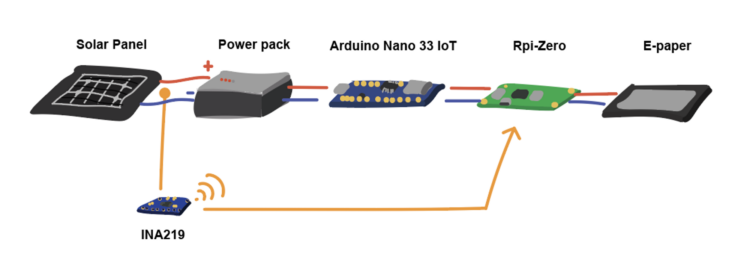
Diagram of system
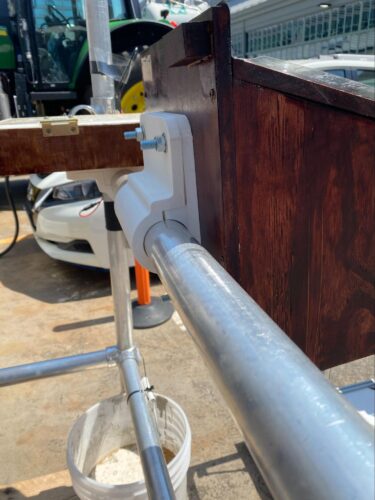
3D printed bracket to connect project to speed rail

The project installed onsite, but missing the companion mechanical laser cut hummingbird wings
Project Name: Crack of Dawn
Designers: Jaxon (Zi-Dong) Wang and Teresa Wang
Project Description:
Crack of Dawn performs a gentle intervention of solar energy’s role in plant growth. Photovoltaic solar cells currently operate at an efficiency of 25%. By converting solar energy to power grow lights for plants that already reside outside this project highlights the inefficiency of our current methodologies to harness available energy.

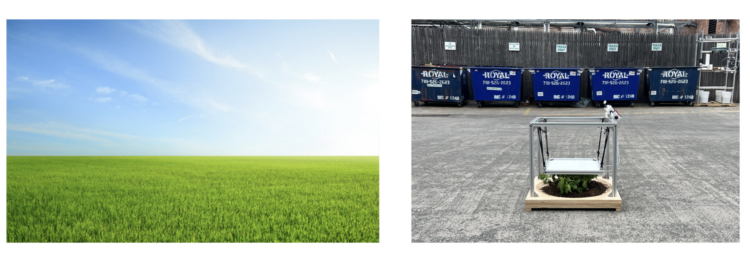
Envisioning a future where the ironic device is embedded in a natural environment
Project Name: Sundrops
Designers: Michal Shoshan and Andrés Franco
Project Description:
[The team] wanted to take something invisible and make it visible: sunlight. [They] pondered the vast variety of sunlight, contrasting how we, as humans, perceive it with its true complexity. [They] considered its different manifestations throughout the day and under various circumstances.
Using an RGB sensor, a microcontroller, four servo motors, four bottles of paint, and four hoses, [the designers] created a mechanical painting sculpture that drops four colors onto a paper sheet based on their relative percentage of the current ambient light. This sculpture utilizes a solar panel and battery to power the microcontroller and motors, employs gravity to release the paint onto the paper, and harnesses wind as an input for the random movement of the paper sheet.
Building the animatronic device in the lab

Sundrops detail
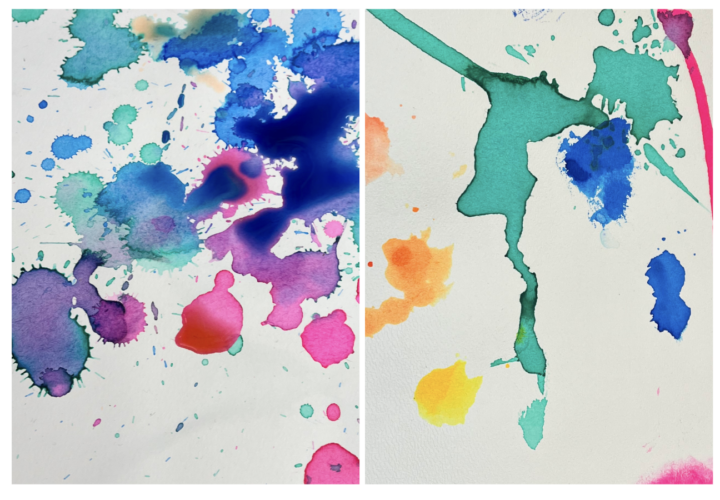
Art produced by the solar-powered art machine
Project Name: Light Room
Designers: Tom Xia & Jasmine Nackash
Project Description:
This solar-powered project operates like a camera that captures the passage of time through sunlight and culminates in a series of prints that trace the sun’s intensity and movement throughout the day
At the heart of Light Room is a mechanism featuring a shutter-like and a rolling film-like system, all powered by solar energy. [The designers were] using solar panels that not only power the device but also dictate its operations. The device houses a Cyanotype-covered paper that changes its color when exposed to sunlight. As the shutter periodically opens throughout the day, this paper captures the sun’s trajectory, creating prints that reflect variations in solar intensity and patterns over time.
The rolling mechanism activates when there’s insufficient sunlight, essentially “rolling the film” in preparation for the next exposure. Additionally, [the team used] a microcontroller to manage the opening and closing of the shutter at regular intervals during peak sun hours.
Light Room is a nod to the traditional darkroom used in photography. However, instead of developing photos in the dark, it invites the sun in to “develop” images of itself.
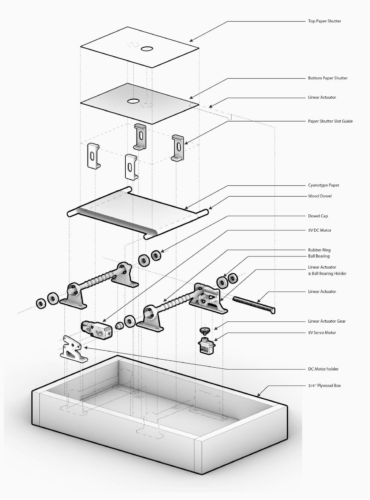
Exploded View

Inside look at Light Room
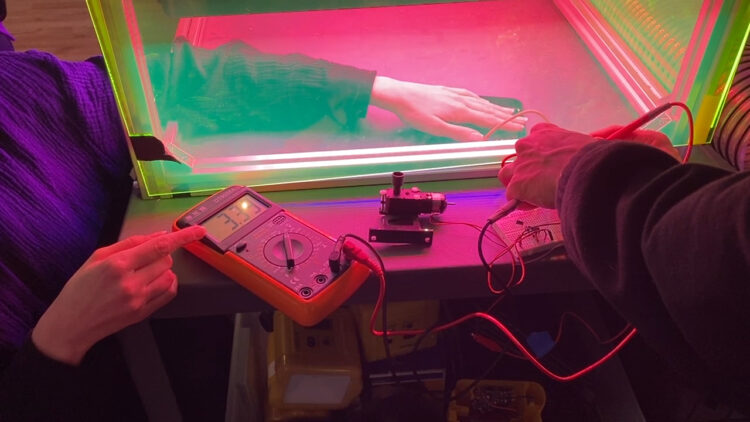
Testing Beam circuit in the lab
Light Room making use of 3D model contributed by another team
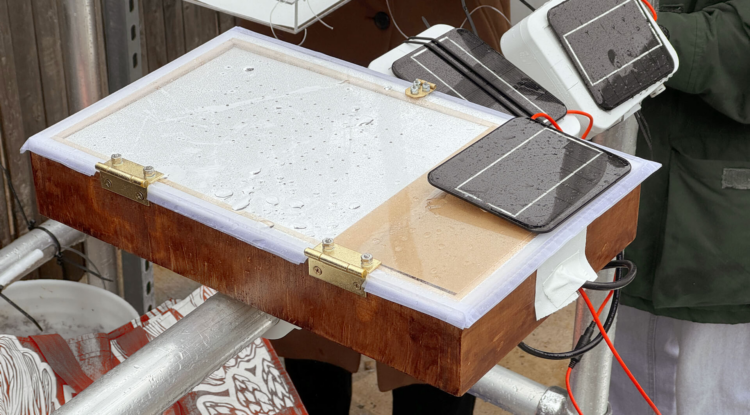
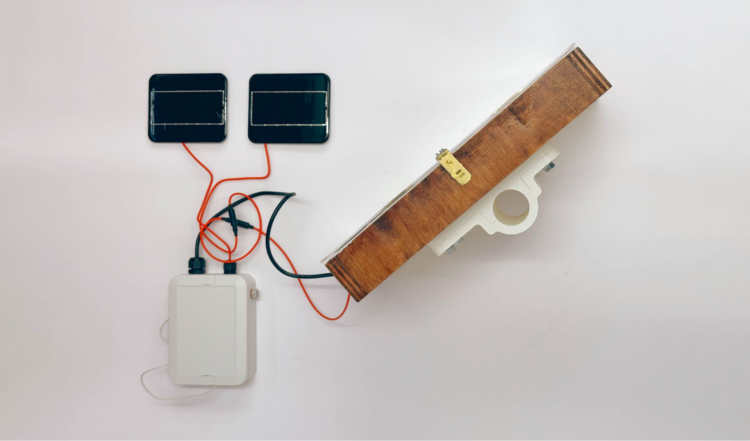
The project installed onsite
Take Aways
An impressive aspect of this experiment was the students’ ability to collaborate. None of the projects would have been possible within the time frame if it hadn’t been for their ability to coordinate and assist each other. The teams all benefited from sharing:
- Technical information with each other (from the path of the sun to the sharing of a 3D model used to stabilize projects on the display structure
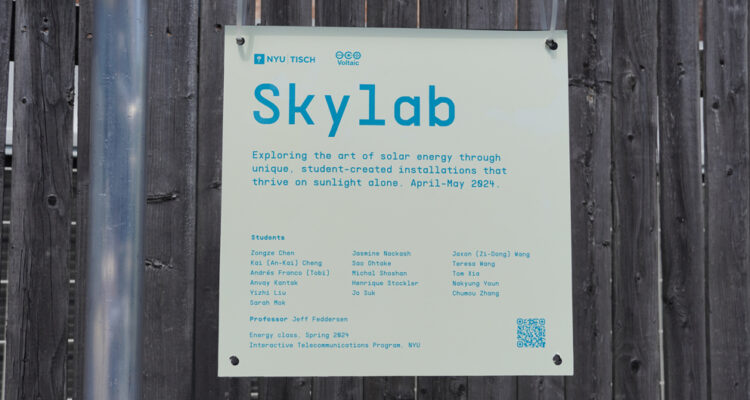
- Project documentation (including creating graphically elegant and unifying signage)
- Part transport and SkyLab construction
- Networking setup for all projects
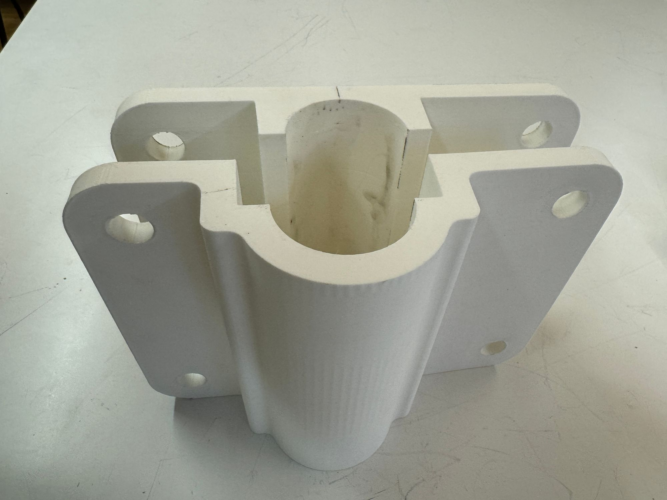
Shared 3D Bracket model
An impressive aspect of this experiment was the students’ ability to collaborate. None of the projects would have been possible within the time frame if it hadn’t been for their ability to coordinate and assist each other. Without their collaborative spirit, it would have been impossible for them to build these ambitious remote projects that depended on:
- Sharing information with each other (from the path of the sun to the sharing of a 3D model used to stabilize projects on the display structure)
- Documenting the projects (including creating graphically elegant and unifying signage)
- Transporting the parts and constructing the display structure, coordinating passes and supplies
- Setting up networking for all projects
We had an especially rainy April this year in New York and even the low power projects were challenged by the amount of available sunlight. Nevertheless, through designing, building, testing, and deploying their projects, the students learned about power management, panel orientation, in-lab testing versus real-world conditions, installation challenges, and the importance of testing devices after deployment.
A+
Are you a student with a solar project idea that you need help with or a project you want to show off?
Leave a Reply